Managing Scheduled Orders
Create New Scheduled Order
- You can create a new Scheduled Order in QPilot Merchant Center > Dashboard > Scheduled Orders by selecting the "+" button.

- Then, add a customer, product, payment method, and more as outlined in Editing Scheduled Orders.
- If the customer doesn't populate in the dropdown, open the customer's profile in your connected site admin page (for example, if you are using Shopify go to Shopify > Customers >> Edit) and update their profile. This should trigger their profile to sync to QPilot. Then repeat steps 1-2.
- If the profile doesn't sync, you'll need to create a QPilot customer profile manually in QPilot Merchant Center > Dashboard > Customers and then repeat step 1-2. Learn more here: Customer Fields.
- Once you select "Update" your Scheduled Order will be created! Your customer can see their new Scheduled Orders in your connected sites Customer Profile Manager (often referred to as My Account) Scheduled Order page.
Failed Scheduled Orders
There are two primary steps to processing a Scheduled Order as outlined here, this includes pre-processing and processing. A Scheduled Order can fail to process at either of these steps - learn more about these steps here: How Processing Works.
In the case that a Scheduled Order does not complete any of the processing steps successfully, the Scheduled Order is assigned a "Failed" status. Failed Scheduled Orders occur for the following reasons:
Payment Processing Error (Error 2000 or 2001): the payment method failed to process.
- Scheduled Order status: Failed
- Order Status in Integration: Created and placed into a "Pending Payment" status
Pre-Processing Error (Error 1000-1004): the Scheduled Order can not start processing because it is missing items, a shipping rate, a payment method, or the items are not available to ship.
- Scheduled Order status: Failed
- Order Status in Integration: No order was created
Site/API Connectivity (Error 3000-3002): your connected site's API is not able to communicate at the time the Scheduled Order is processing.
- Scheduled Order status: Failed
- Order Status in Integration: Unknown
System Error (Error 99): an unknown error occurred during processing.
- Scheduled Order Status: Failed
- Order Status in Integration: Unknown
Manual Selection: the merchant editing the Scheduled Order assigned the status as "Failed".
- Scheduled Order Status: Failed
- Order Status in Integration: Unknown
Learn more about processing errors here: Processing Errors
Resolving Failed Scheduled Orders
Step 1: Identify the Processing Error
To identify the processing error, visit QPilot Merchant Center > Dashboard > Scheduled Orders and review the "Last Cycle Status".
You can review this document for more information about processing errors: Processing Errors
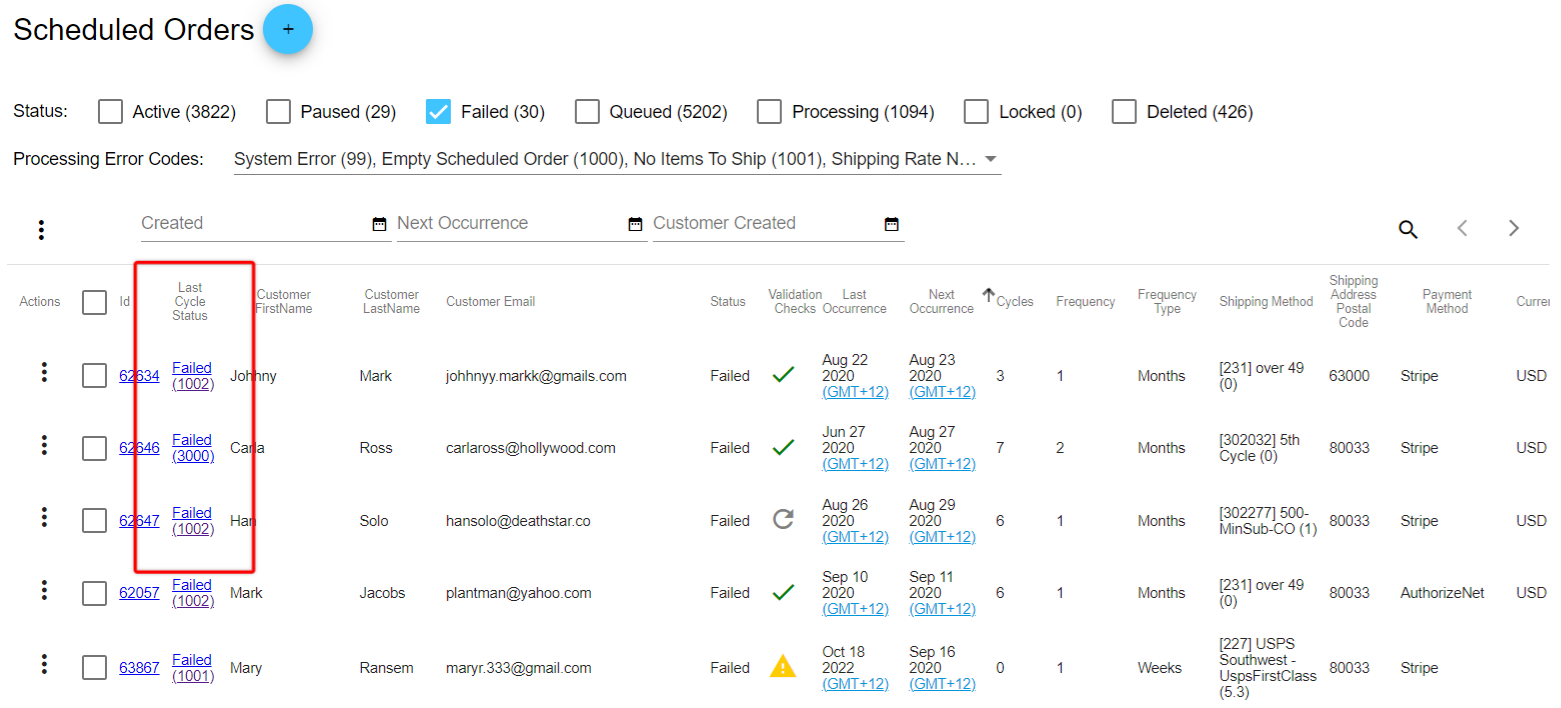
Example of Identifying Failed Scheduled Orders
Step 2: Identify the Best Next Steps
Select the processing error as shown in the Last Cycle Status, this will take you to an informative document that describes:
- What Does This Error Mean
- Common Causes (if applicable)
- Suggested Next Steps
- After Resolving The Issue (This section will tell you what to do in Step 3!)
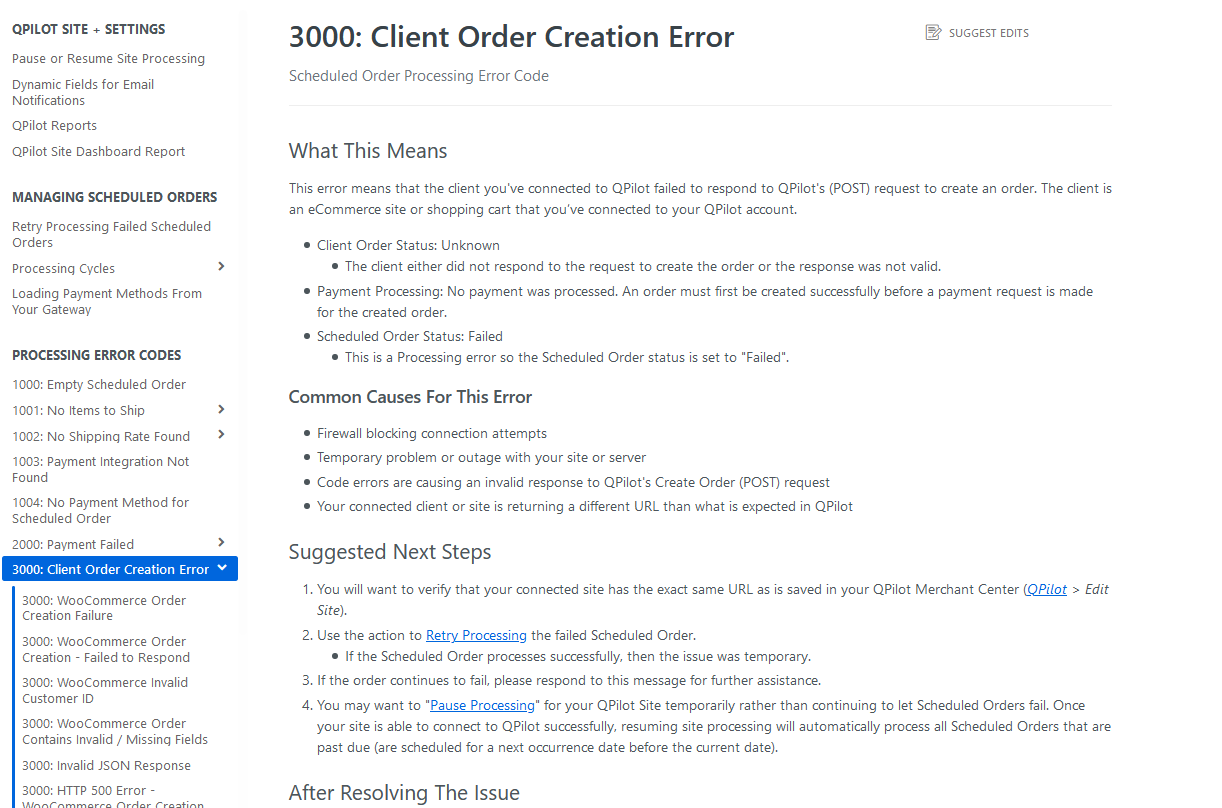
Example of Documentation for a 3000 processing error (Client Order Creation Error)
You should follow the steps outlined in the linked QPilot Knowledge Base article to resolve the issue!
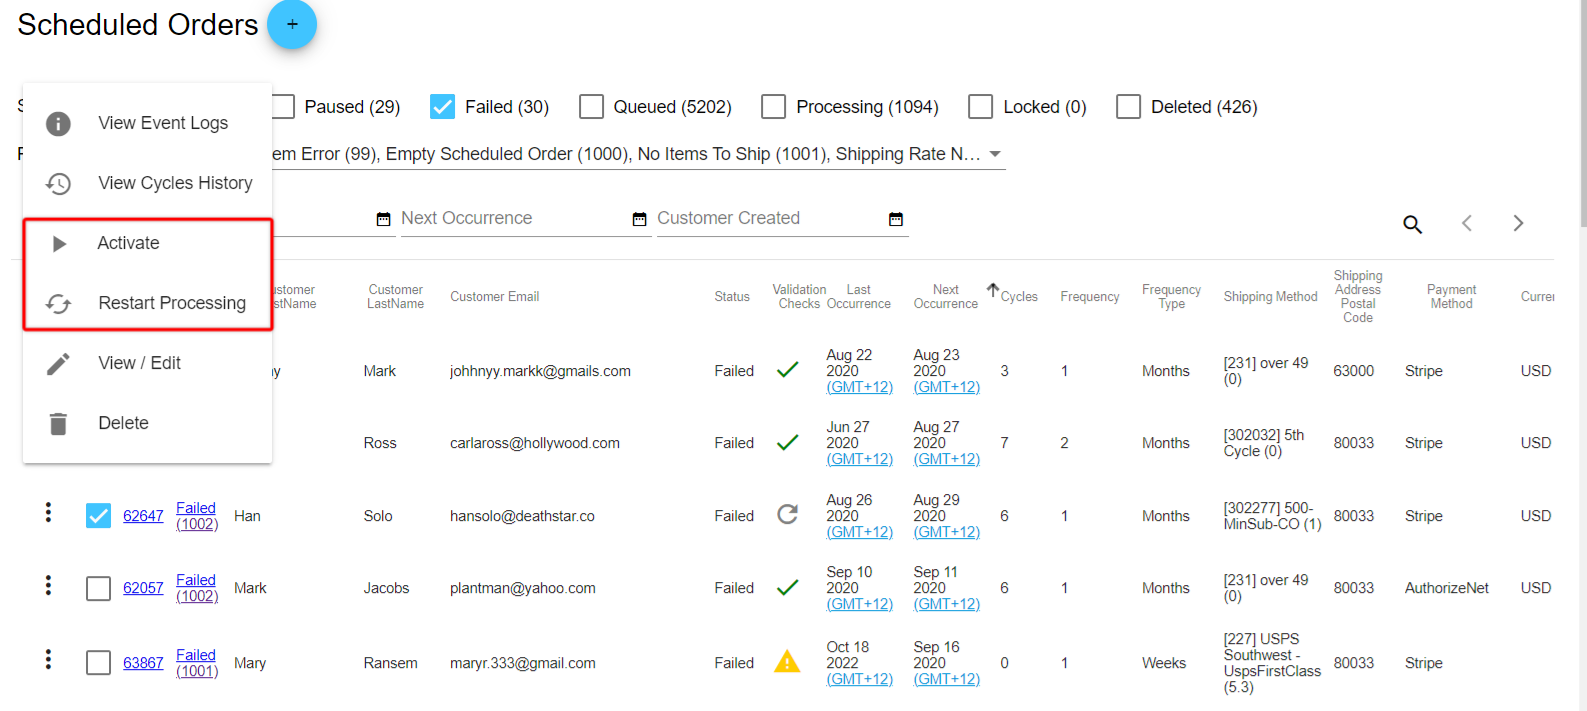
Step 3: Retry Processing the Scheduled Order
Now that the issue has been resolved/identified, you have two options:
- Retry Processing the Scheduled Order (as outlined in the Suggested Next Steps in Step 2). This can be used to retry processing immediately.
- Update the Scheduled Order's Next Occurrence Date in QPilot Merchant Center > Dashboard > Scheduled Orders > View/Edit and update the status to Active. This will process the order on a future selected date.
How to retry processing a Scheduled Order:
To retry processing a Scheduled Order you should follow the direction outlined in Step 2 "After Resolving The Issue". Note: You should always review the action being taken to retry a Scheduled Order, different actions have different results!
These actions are also outlined in this Document: Retry Processing a Failed Scheduled Order.
Step 4: Further Troubleshooting
If the Scheduled Order continues to fail, we recommend reaching out to our support team ([email protected]) for further assistance.
Managing Inactive Scheduled Orders
If you notice that there are many Scheduled Orders in a Paused or Failed status in QPilot Merchant Center > Dashboard > Scheduled Orders, we recommend reviewing them. Some recommendations we may make are:
- Reaching out to any customers with Scheduled Orders that have Failed or Paused for over 6 months (or another selected time frame). This way they may resume or reactivate their Scheduled Order!
- Placing selected Scheduled Orders into a Deleted Status (such as those that have been Failed or Paused for over 6 months).
Identifying Inactive Scheduled Orders
-
Filter QPilot Merchant Center > Dashboard > Scheduled Orders by Paused and/or Failed
- For example, you can filter only Scheduled Orders that have a Last Occurrence Date of 6 months or longer.
- Or you could filter the Scheduled Orders by Next Occurrence, any that are set to 6 months ago or more.
- Pro-tip: You can export the Scheduled Order page to a CSV file (from the three-dot menu). Using this file you can sort Scheduled Orders further.
Updating Paused or Failed Scheduled OrdersIt's important to consider how actions may affect your customers before making a decision on updating recently failed/paused or inactive Scheduled Orders.
- For example, attempting to reprocess a Scheduled Order that has been failed for a while versus recently failed, may be unexpected and confusing to the customer.
Resuming Inactive Scheduled Orders
You can resume a Failed or Paused Scheduled Order in QPilot Merchant Center > Dashboard > Scheduled Orders by updating the Next Occurrence Date and then setting the status to Active. You may also retry processing the Scheduled Orders that failed to attempt recovering them.
If the Scheduled Order is failed, you should first ensure the issue is resolved. See Failed Scheduled Orders above.
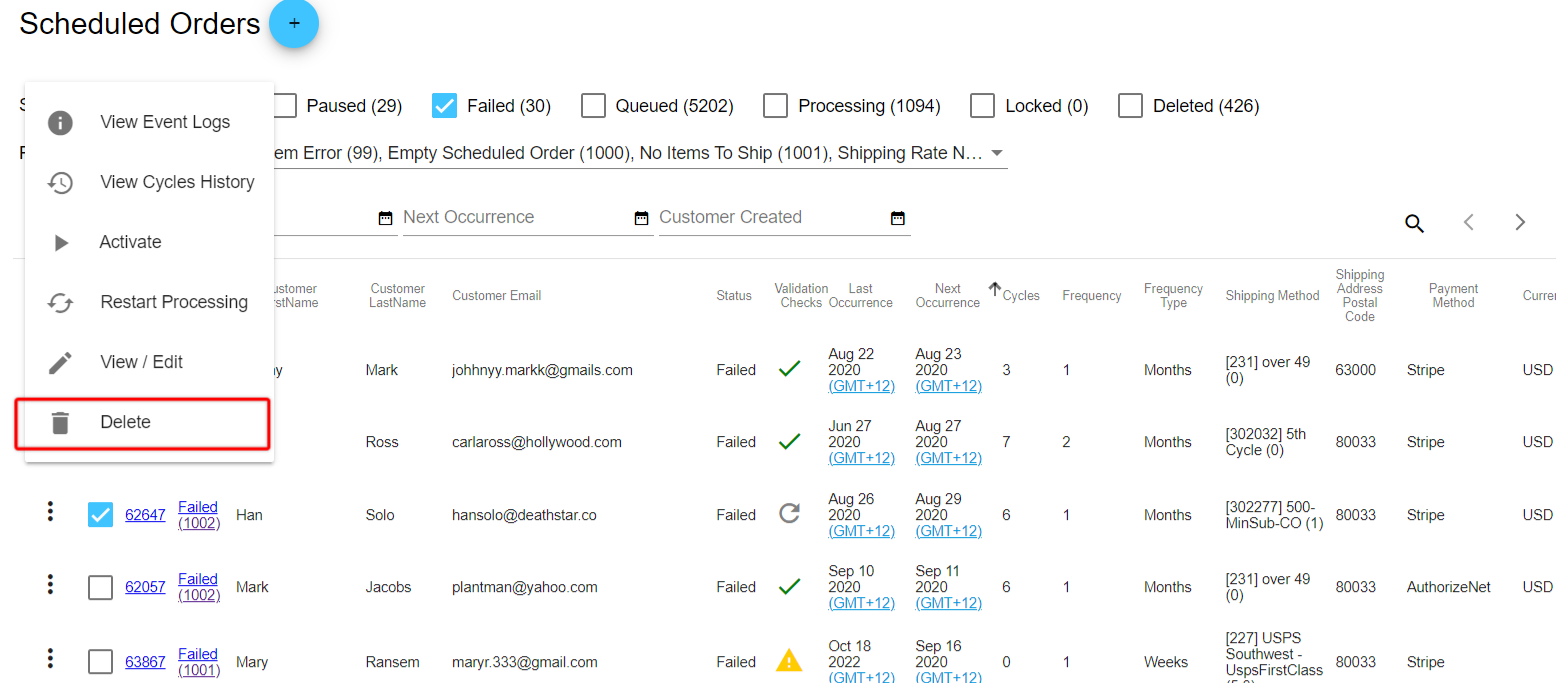
Deleting Inactive Scheduled Orders
You may delete a Scheduled Order in QPilot Merchant Center > Dashboard > Scheduled Orders by selecting "Delete" in the Scheduled Order action menu.
Bulk Actions
You can update Scheduled Orders in bulk by selecting multiple Scheduled Orders on a page, and then selecting bulk actions from the action menu at the top right of the Scheduled Order list view.
Learn More Here: Bulk Action Menu
Automation
You can automate inactive Scheduled Order management using our default MAPs features. For example, you can automatically delete Scheduled Orders that have been Failed for over 120 days.
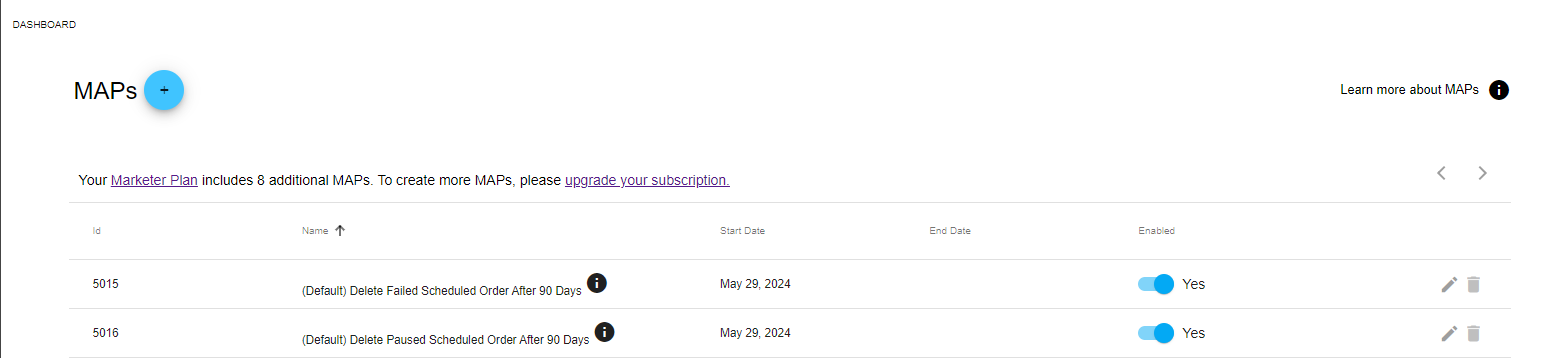
Example of Default Inactive Scheduled Orders MAPs
To enable and edit these settings go to QPilot Merchant Center >> Dashboard >>MAPS. There are 2 default MAPs, one for Paused and another for Failed Scheduled Orders. They are disabled by default but you can easily enable them by turning on the "Enabled" toggle. If you'd like to edit the setup, click on the edit icon.
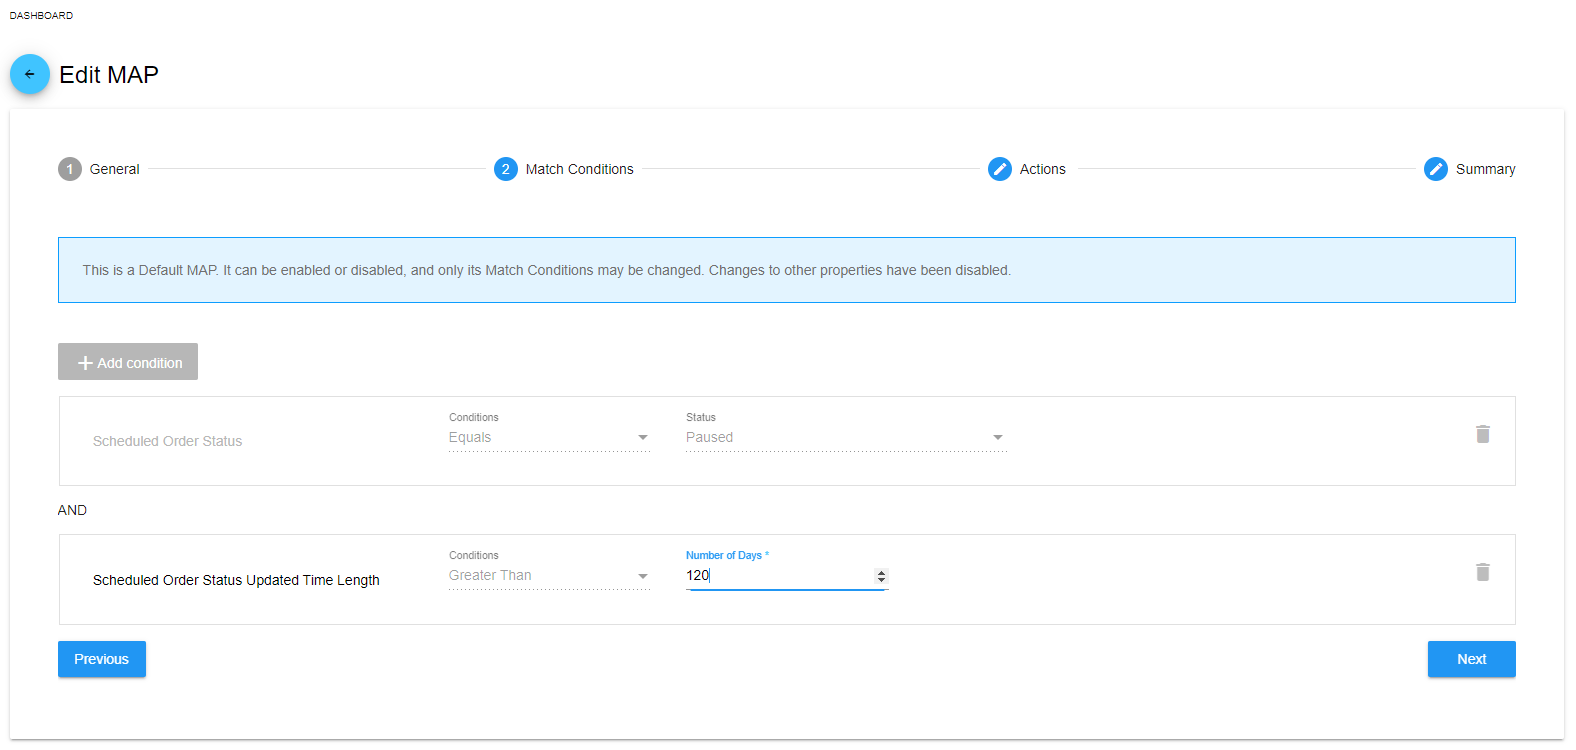
Example of Editing an Inactive Paused Scheduled Order MAP
Notes:
- When "Scheduled Order Deleted" notifications are enabled, customers will be notified if an inactive Scheduled Order is updated to a Deleted status via MAP.
- Enabling these MAPs will not retroactively apply. Only Scheduled Orders that meet these requirements after they are enabled will be affected. If you need assistance retroactively applying these MAPs let our support team know.
- Default MAPs are available to all QPilot Subscription Plans.
Benefits
Managing inactive Scheduled Orders helps both recover reoccurring revenue for your store by reactivating inactive Scheduled Orders and reduce your total Scheduled Orders count. As a result, your monthly subscription charge is also reduced.
Learn more about subscriptions here: QPilot Subscription & Billing
Create a Scheduled Order for a customer who forgot to choose Autoship at checkout
You can create a Scheduled Order for a customer who forgot by simply creating a new Scheduled Order and adding the customer to it! See Create New Scheduled Order for more details.
Note: If the customer did not choose to save her payment method at checkout (which is only required when a product is scheduled for Autoship at checkout, but optional otherwise), you may need to add their payment method to her Scheduled Order a different way.
- If this is the case, you can request that the customer add a payment method via their account manager on your website or you can add it to their Scheduled Order for them after they've added it.
- See this doc for more details: Editing Scheduled Orders
Can I Process a Customer's Scheduled Order Immediately Upon Creation
Yes! To create a Scheduled Order that will process automatically after creation, follow the steps below:
- Go to QPilot Merchant Center > Dashboard > Scheduled Orders and select the Create Scheduled Order "+" icon
- Select the Customer, Shipping Address, Frequency, Product(s), and Payment Method
- Once complete select a Next Occurrence Date on or before the current day's date and set the Scheduled Order Status to "Active". Update the Scheduled Order.
- Or you can update the Scheduled Order, and then select "Process Now" from the Scheduled Order action menu (three dots).
Result: The Scheduled Order will be queued for processing automatically within a few minutes.
Updated 2 months ago