Authorize.Net
Table Of Contents:
- Required for This Integration
- Supported Features
- Unsupported Features
- Required Payment Fields for Authorize.Net
- Setting up Authorize.Net Payments
- Going Live With Your Authorize.Net Integration
- Authorize.Net FAQ's
- Additional Resources
Required for This Integration
- Customer Information Manager
- Let returning customers pay easily and seamlessly without re-entering payment details (also known as payment tokenization)
- API Keys
- API Login ID
- Transaction Key
Supported Features
-
Credit Card Payments: Only credit card payments are supported with Authorize.Net CIM
-
Default Payment Response Delimiters: Delimits the fields in the response back to QPilot upon payment processing of a Scheduled Order.
- Authorize.Net default delimiters (Authorize.Net > Settings > Upload Transaction File Format):
a , (comma)
b. | (pipe)
c. " (double quote)
d. ' (single quote)
e. : (colon)
f. ; (semicolon)
g. / (forward slash)
h. \ (back slash)
i. - (dash)
j. * (star)
- Authorize.Net default delimiters (Authorize.Net > Settings > Upload Transaction File Format):
Unsupported Features
- Authorize.Net eCheck payments
- Accept.js
Required Payment Fields for Authorize.Net
- Gateway CustomerId
- Gateway PaymentId
- Billing Address (your billing address for payment methods in your Authorize.Net CIM must match the address the issuing bank has on file)
- Payment Method Description (optional, but strongly suggested because it is used to display the payment method to your customer)
Setting up Authorize.Net payments
Navigate to QPilot Merchant Center > Dashboard > Payment Integrations. Once there, select the "Add" button (blue circle with the "+" sign in it) to add a new payment integration.
Make sure that "Test Mode" is enabled, select the "Payment Method Type" dropdown, and then select
"Authorize.Net", enter the sandbox API Login Id & Transaction Key. When you're done, select "CREATE".

You should now see a new Authorize.Net payment integration in your Payment Integrations list.

Why should "Test Mode" be Enabled?
- We strongly suggest testing your new Authorize.Net Payment Integration before going live. Testing with your Authorize.Net Sandbox will quickly verify that the integration is working as expected before attempting to process any live payments with QPilot.
- You can review Authorize.Net's testing guide complete with test card numbers in their documentation here.
Need an Authorize.Net Sandbox Account?
Go to https://developer.authorize.net/hello_world/sandbox.html to sign up for an Authorize.Net Sandbox Account so you can safely test your Authorize.Net payment methods with QPilot.
Going Live with your Authorize.Net Integration
Ready to go live with a Payment Integration?
In order to enable live payments (and disable 'Test Mode') please ensure you have activated your QPilot account with a subscription plan.
Then make sure a "Production" environment is selected for your site in QPilot Merchant Center > Edit (site) > General Settings.
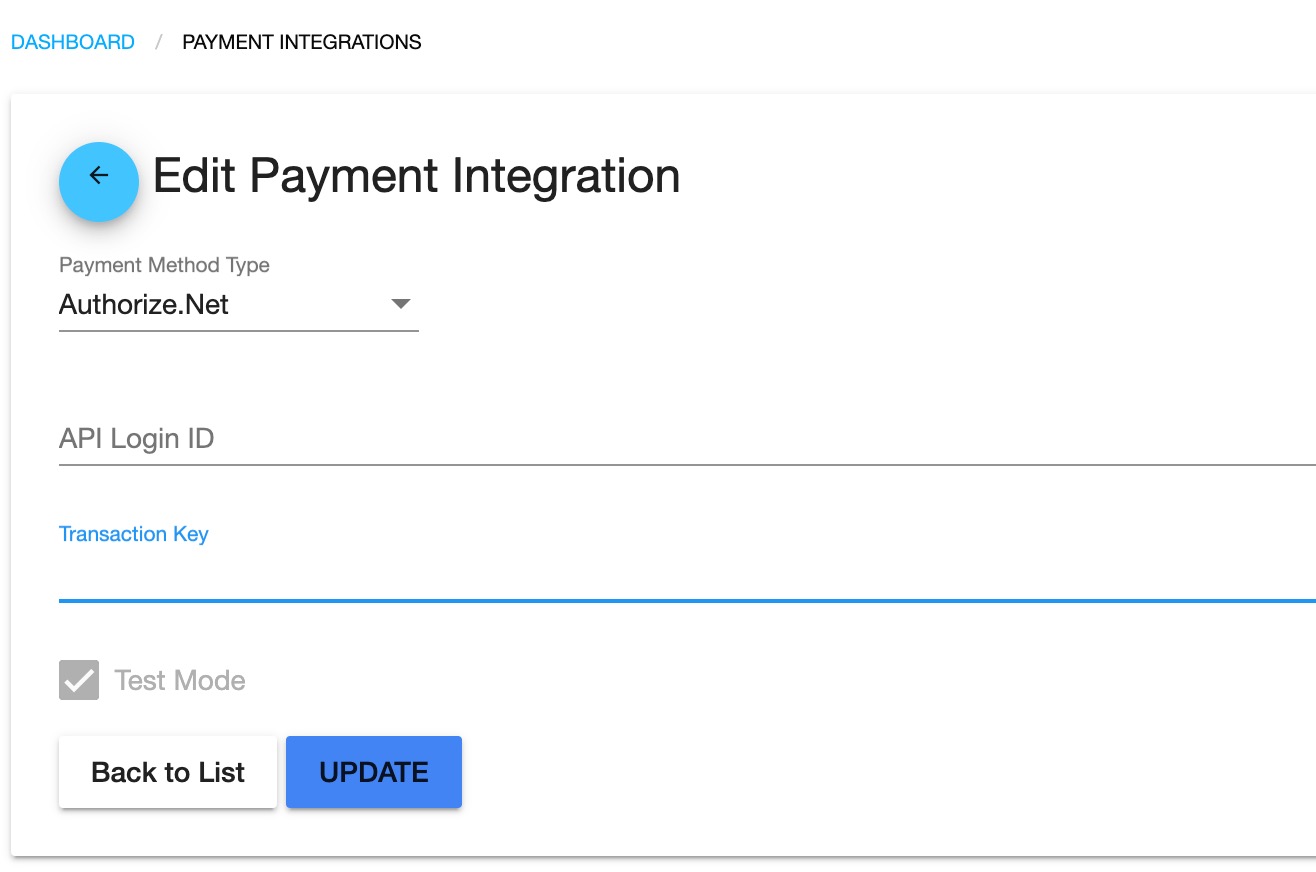
Once the site environment has been set to "Production," navigate to QPilot > Sites > Payment Integrations and edit the Authorize.Net integration.
Update the API Login Id and the Transaction Key from your live Authorize.Net account, toggle off "Test Mode," and "UPDATE."

Authorize.Net FAQ's
- Where do I find my API Login Id and Transaction Key?
- How to Create a New Authorize.Net CIM Customer Profile Manually
Where do I find my API Login Id and Transaction Key?
Login to your Authorize.Net account and go to Accounts > Settings > API Credentials & Keys. Copy your API Login Id and create a new Transaction Key, copying it to your Authorize.Net payment integration in QPilot.

How to Create a New Authorize.Net CIM Customer Profile Manually
In cases where a customer wants you to enter their payment information manually using Authorize.Net, and have that payment method saved for QPilot, merchants can add a new customer profile to their Authorize.Net CIM directly and then create or edit a Scheduled Order with the payment data added to Authorize.Net.

- Login to your Authorize.Net Customer Information Manager (CIM)
- Within the CIM, select "Add Profile" (at the top)
- Fill out the customer's user and billing information:
- Email: Customer's email
- Billing Address
- Payment Type: Credit Card
- Card information: Number, Exp Date, CVV
- Shipping Address (if different than the Billing)
- Select 'OK' to create the Customer in the CIM
- Now that the Customer is added to the CIM, you can safely add their Customer Profile ID and Payment Profile ID to create a payment method for their Scheduled Order.
Additional Resources
Updated over 3 years ago
