Managing Shipping Rates
Merchants can create and manage shipping rates from their connected QPilot Site (QPilot Merchant Center > Dashboard >> Site Settings >> Shipping Rates).
How To Create A Shipping Rate
- From within the QPilot Merchant Center open your site dashboard and select Site Settings >> Shipping Rates >> Create New (blue + icon).
- Enter a name for the shipping rate
- In the "Shipping Address" section, select a Country for the shipping rate to match.
- In the "Enabled Shipping Methods" section, select a rate (such as Flat Rate) as the Shipping Type
a. To create a Carrier Rate, first please ensure that you have already followed our 3 Step Guide to USPS Shipping Carrier Integration. - In the "Shipping Pricing" section, enter a Base Price for the shipping rate
a. To offer a Flat Rate cost of $4.95, enter "4.95"
b. To offer free shipping, enter "0" - Your site's default currency will apply to the cost
- At the bottom of the page, select "CREATE"
- Your new Shipping Rate will now be displayed on the Shipping Rates page!
Can I Import My Existing Shipping Rates?
Yes! Importing shipping rates from your site can easily be done by formatted your existing shipping rate fields to conform with required fields for shipping rates in QPilot (see QPilot's Shipping Rate Fields). This can be done in a few easy steps:
- Export your site's shipping rates to a csv file
- Export your existing rates from QPilot
- Format you rates to be imported to match QPilot's formatting
- Import your formatted rates to QPilot
Though your site's rates may be formatted differently than the example below, the process for formatting them will be similar. Read on to see one way a user formats & imports their site's shipping rates to QPilot.
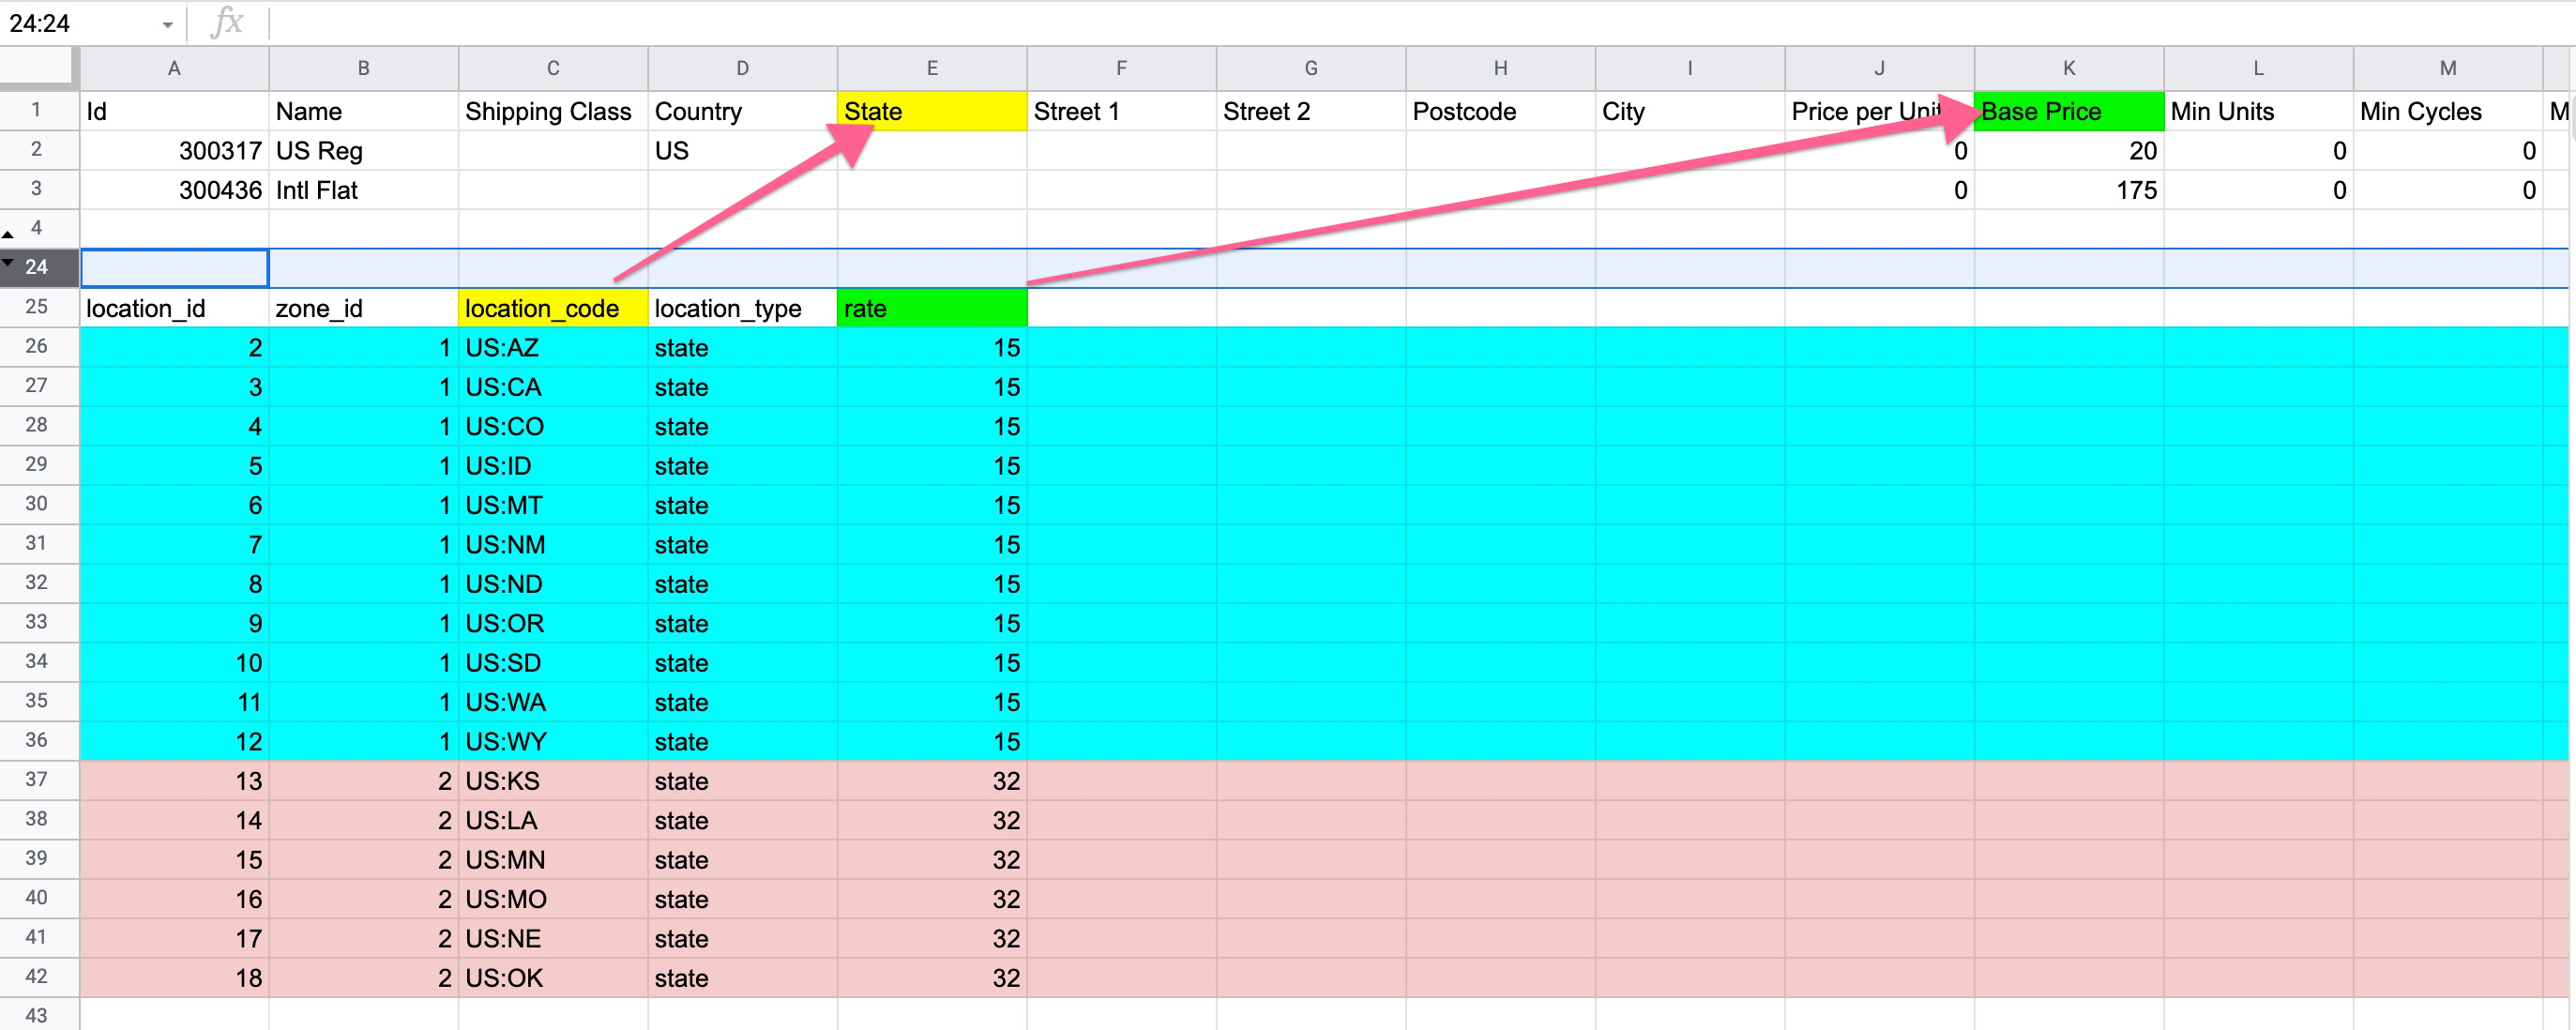
To begin, the user exports their QPilot rate(s) to have a correctly formatted csv they can copy their site's shipping rates into.

Next, you see the shipping rates export from QPilot with the rates exported from the site copied in. See how the site's export has the column names ( "location_code" & "rate" ) which correspond to the "State" and "Base Price" columns and in the QPilot export?

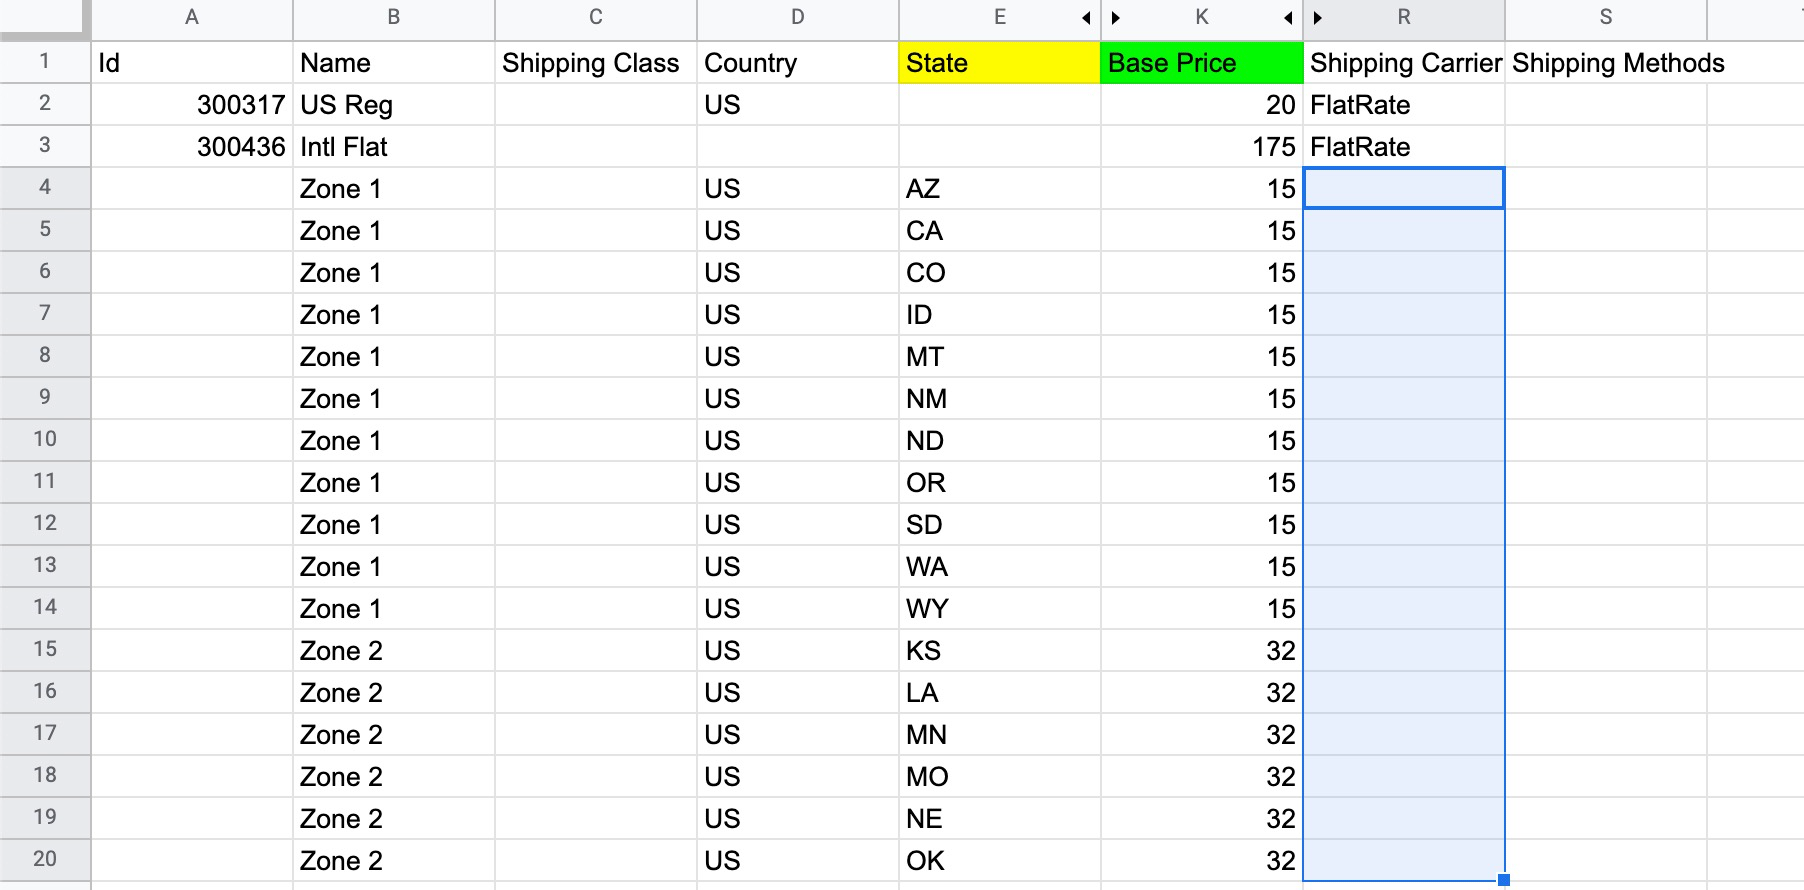
In the recording the user formats & copies the values in the "location_code" column to the State column (on the QPilot shipping rates export), then copies the values in the "rate" column to the "Base Price" column. Finally, user then copies the "zone_id" to use in the "Name" column to be used to identify the rates easier.
Once the correct values have been copied, the user updates the values in the "Name" column by adding "Zone" before the number to make the shipping rates easier to identify in QPilot.
QPilot by default imports shipping rates as flat rates if the "Shipping Carrier" column is empty, so no other values need to be added by the user in this example.

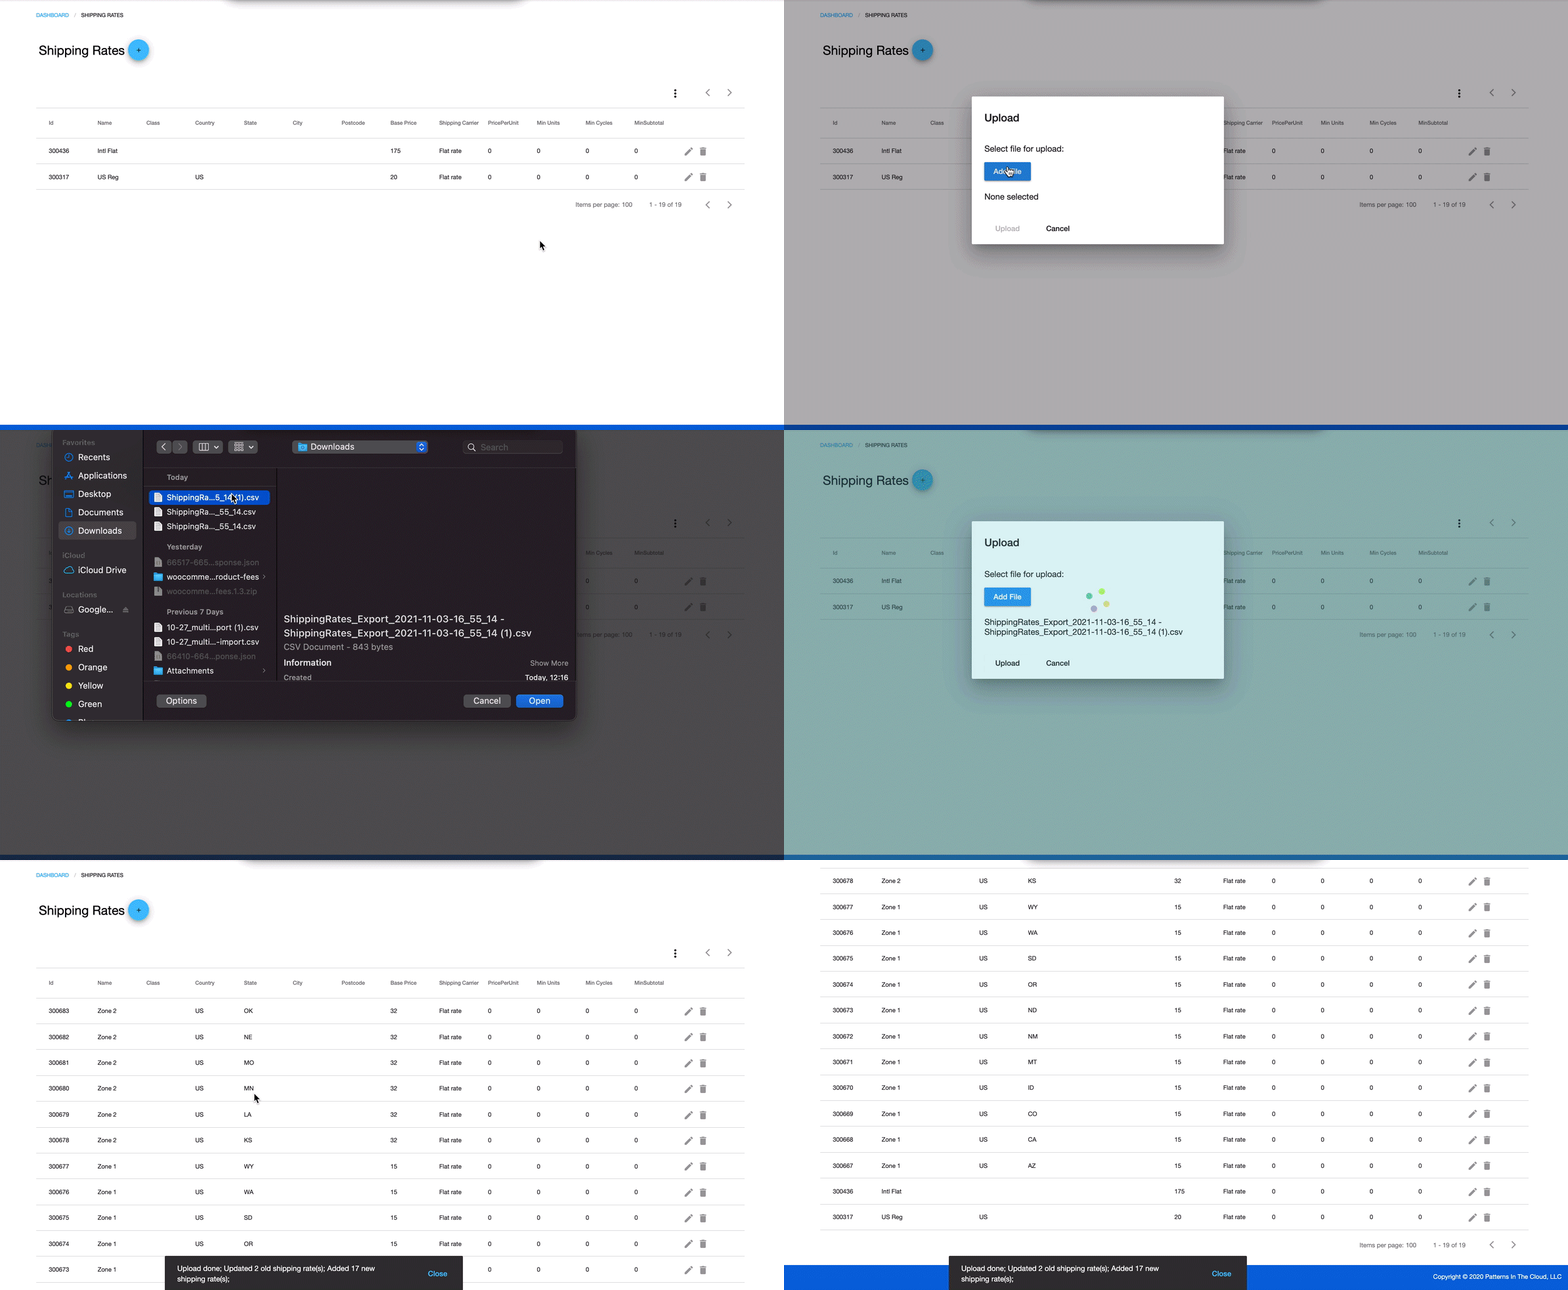
The user then imports the shipping rates to QPilot. See how the Id and Shipping Carrier values have been filled automatically by QPilot?

Note, the steps to format rates to QPilot's fields may differ slightly based on how a site's shipping rates are configured or how they stored in the site database.
Special Considerations
- Id : Shipping rates imported to QPilot without a value in the "Id" column will be imported as new. If a shipping rate in the import has an Id, then it will find and update the existing rate when imported.
- Postcode : If Multiple postal codes are used for a single rate their values must be separated by a bar "|" and with no blank spaces
Managing Shipping Rates for Scheduled Orders
Users have 2 options when applying shipping rates to their Scheduled Orders:
- Automatically applying the lowest cost rate from those available (selected by default)
- Select a "preferred shipping rate" from those available.
Depending on the selection, the behavior differs slightly when a Scheduled Order's shipping rates are refreshed.
How Shipping Rates are Refreshed
When making changes to a Scheduled Order's shipping address or products, the available shipping rates are refreshed in real-time. Users may experience 2 different behaviors depending on whether a "preferred shipping rate" is selected manually (explained in detail below) or if they have the checkbox selected for applying the lowest cost shipping rate (default) .
- If the checkbox for "Automatically select the lowest cost shipping rate" is selected the shipping rate will be updated with the lowest cost rate from those available automatically.
- If a "preferred shipping rate" is selected, and the selected shipping rate no longer applies, the user will be required to select a new one or apply the lowest cost shipping rate by selecting the checkbox.
Overriding a "Default" Shipping Rate
When the "default" shipping rate is not the preferred available shipping rate, merchants can override the "default" shipping rate by selecting another shipping rate that is available to the Scheduled Order.
To override the "default" shipping rate with another available shipping rate:
- Edit a Scheduled Order
- Go to the "Shipping Rate" Section
a. The total number of available shipping rates are displayed in parenthesis "()" - Select a different shipping rate to apply to the Scheduled Order
a. The cost for each available shipping rate is displayed in parenthesis () after each shipping rate's name - Confirm your change by selecting "UPDATE"
- When reviewing a Scheduled Order from the Scheduled Orders page, the new shipping rates name will appear within the "Shipping Method" column for the Scheduled Order
Important: Only other available shipping rates can be selected when editing a Scheduled Order. Shipping rates with the same level of specificity are considered "available" shipping rates.

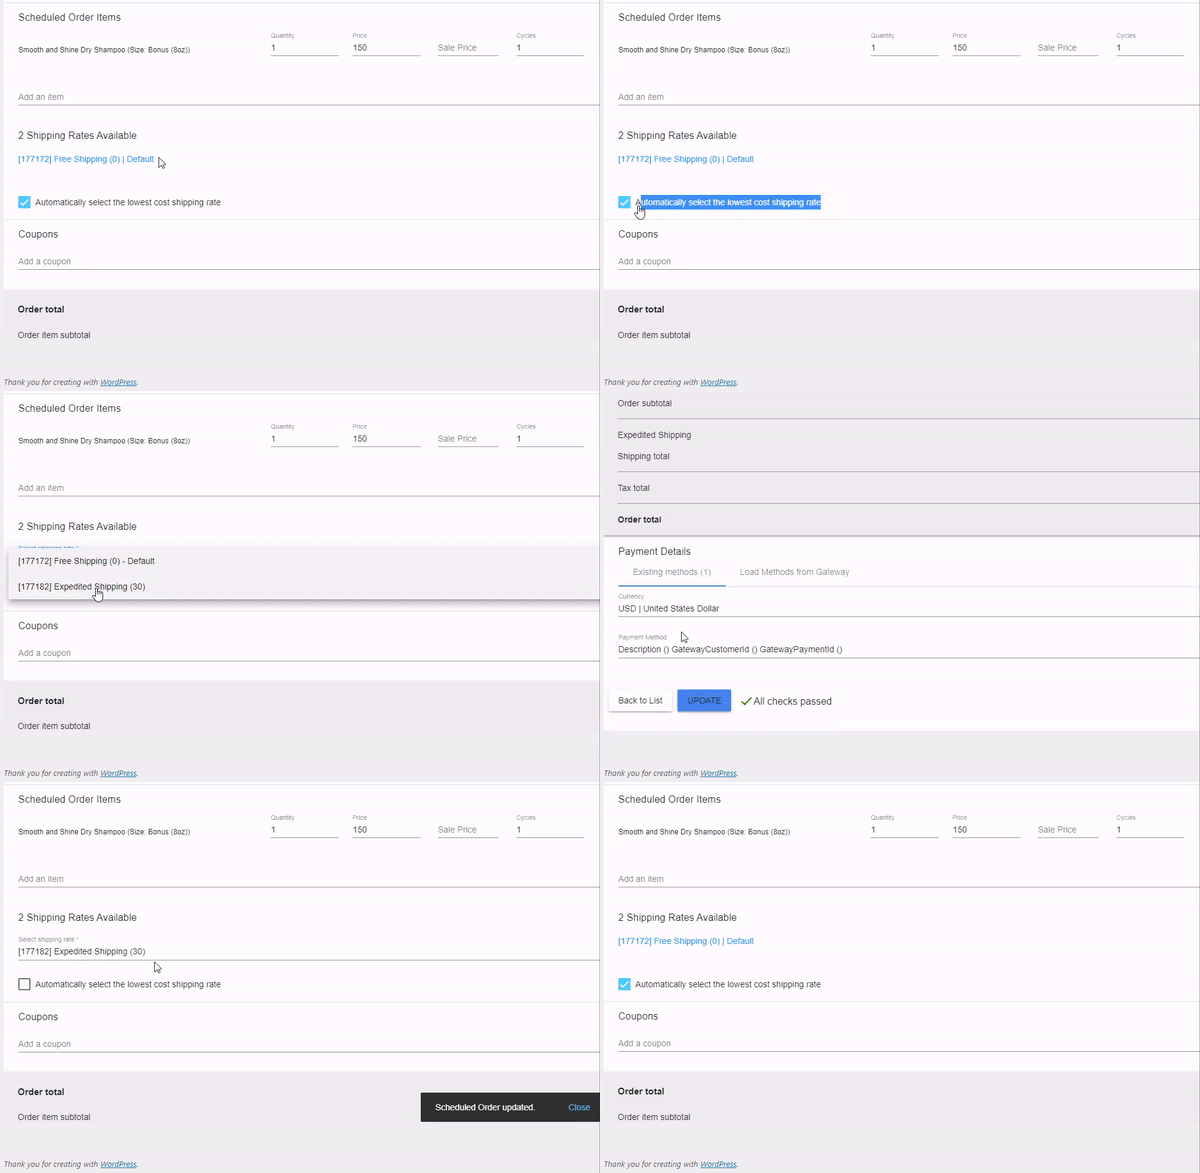
Example of refreshing and overriding a default shipping rate
Updated about 4 years ago
