Stripe
Required For Integration
- A Stripe account
- API Keys
- Publishable Key
- Secret Key
Unsupported Features
- Digital Wallets / Express Checkout (Apple / Google Pay)
- Payment Requests API
Required Payment Fields for Stripe
- Gateway CustomerId
- Gateway PaymentId
- Billing Address
- Payment Method Description (optional, but strongly suggested because it is used to display the payment method to your customer)
Setting up Stripe Payments
Navigate to QPilot Merchant Center > Dashboard > Payment Integrations. Once there, select the "Add" button (blue circle with the "+" sign in it) to add a new payment integration.

Make sure that "Test Mode" is enabled (unless you are ready to begin using the gateway in Live mode), click the "Payment Method Type" dropdown and select "Stripe", enter the required API credentials.
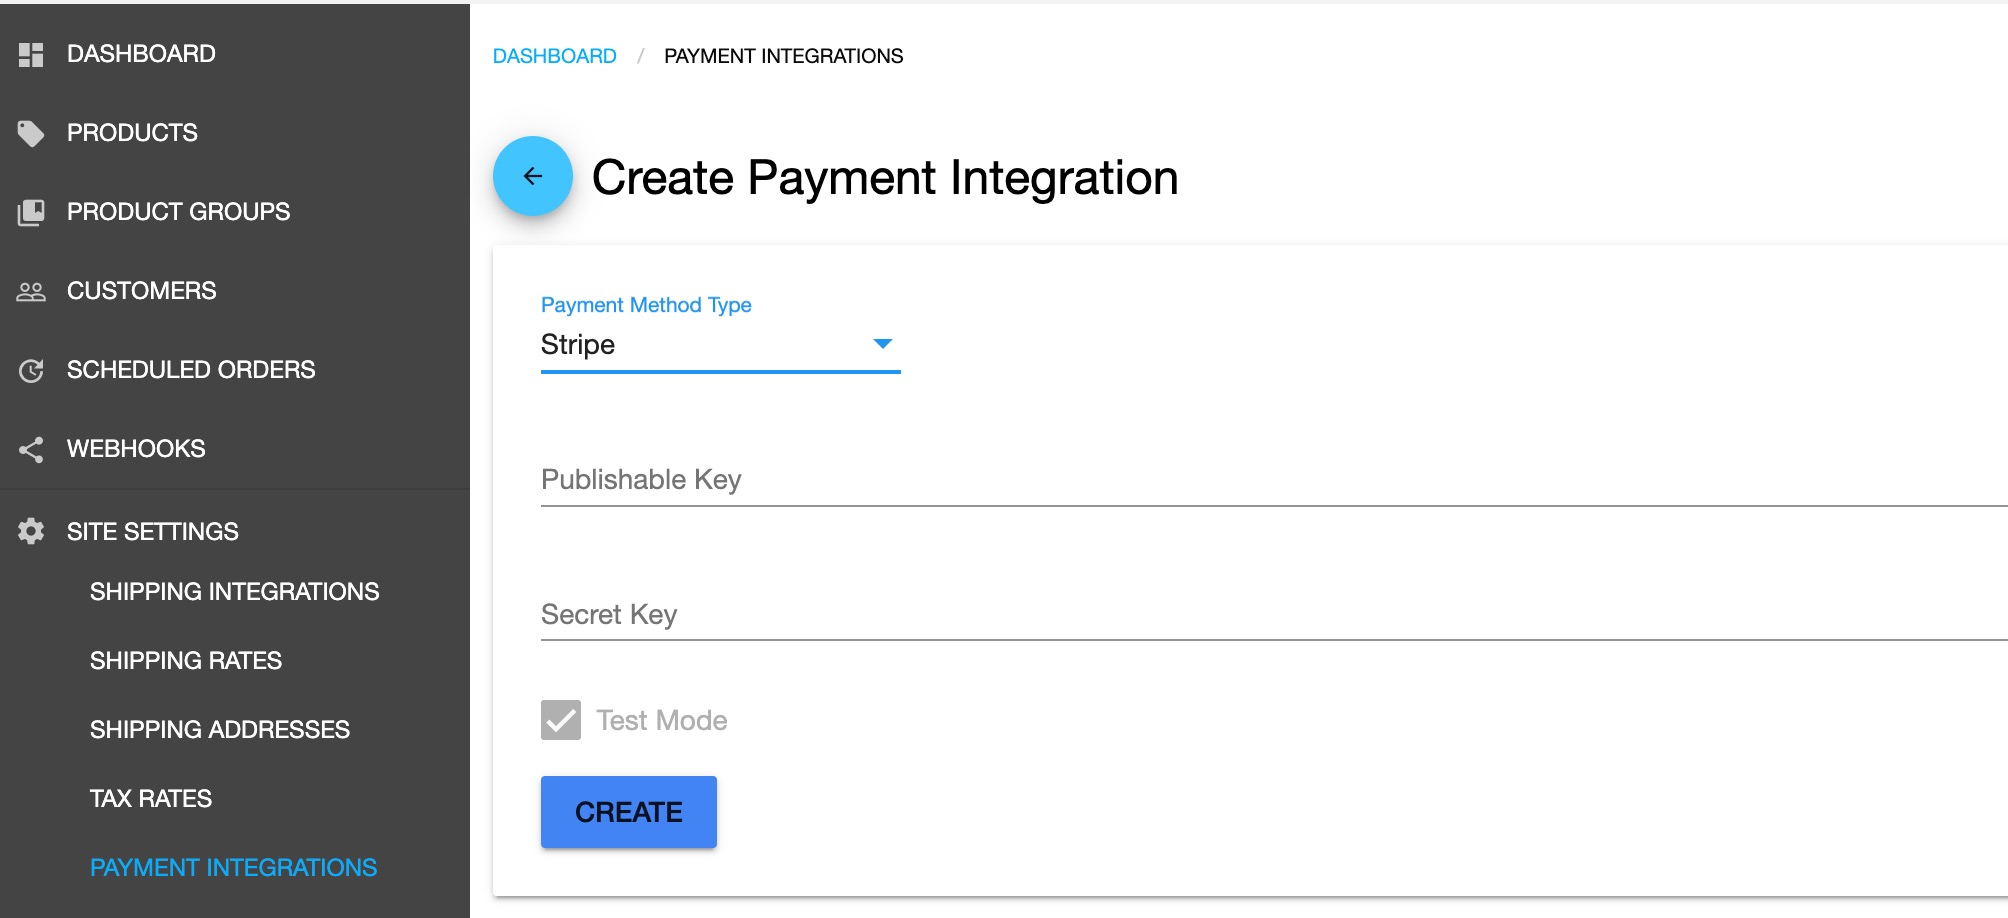
When you're done, click "CREATE". You should now see a new Stripe payment integration in your Payment Integrations list.

Ready to go live with a Stripe?
In order to enable live payments (and disable 'Test Mode') please ensure you have activated your QPilot account with a subscription plan.
Then make sure a "Production" environment is selected for your site in QPilot Merchant Center > Edit (site) > General Settings
Other Stripe Features
Stripe Strong Customer Authentication
Strong Customer Authentication (SCA) may be required when a customer's bank decides not to accept a previously authenticated payment method or an exemption. Payments declined for this reason then have to be resubmitted to the customer with a request for Strong Customer Authentication.
SCA is enabled automatically in regions that require it and requires additional configuration in QPilot to ensure that customers are able to respond when their Scheduled Order fails to process due to their bank requiring them to re-authenticate their payment method.
Helpful Resources about Stripe SCA
- Stripe Strong Customer Authentication.
- Businesses affected by Strong Customer Authentication (SCA) regulations
Enabling the Customer Email Notification for Strong Customer Authentication
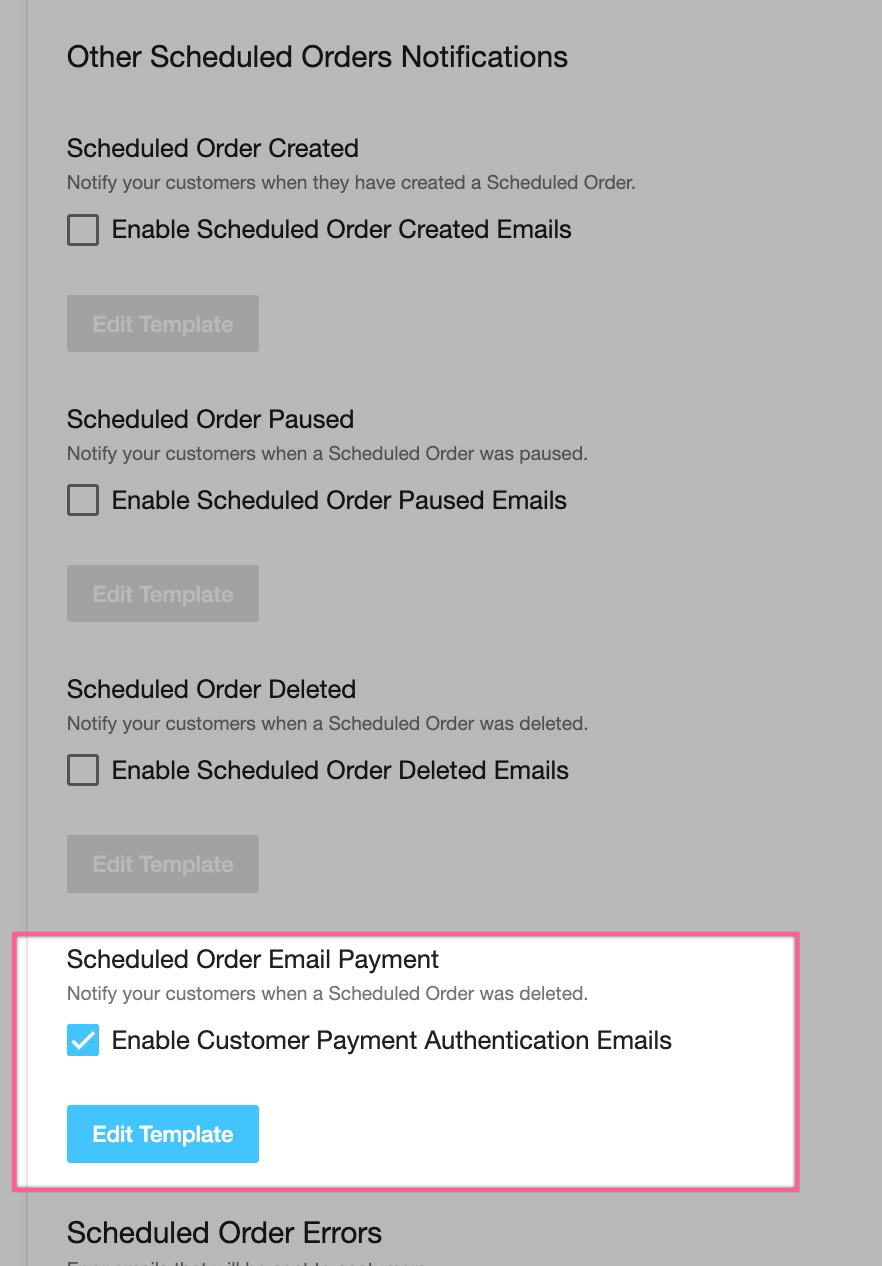
- Enable the Customer Email Notification for Your QPilot Site
- In your QPilot Merchant Center, navigate to Sites > Dashboard > Email Notifications >> Other Scheduled Order Notifications and enable the "Scheduled Order Email Payment" notification.
- Select "UPDATE" to confirm your changes.
What Happens When a Scheduled Order Fails to Process Due to SCA?
- The Scheduled Order's status will be "Failed" because the payment was declined.
- A message will be sent to the customer's email address for the Scheduled Order requesting them to "click here to authenticate your payment".
- The customer selects the link and is directed to a page that enables them to re-authenticate their payment method.
- If the re-authentication is successful, the Scheduled Order will become active & continue processing, and the customer is redirected to their customer portal (to view their Scheduled Orders).
- If the re-authentication fails, the Scheduled Order's status will remain "Failed".
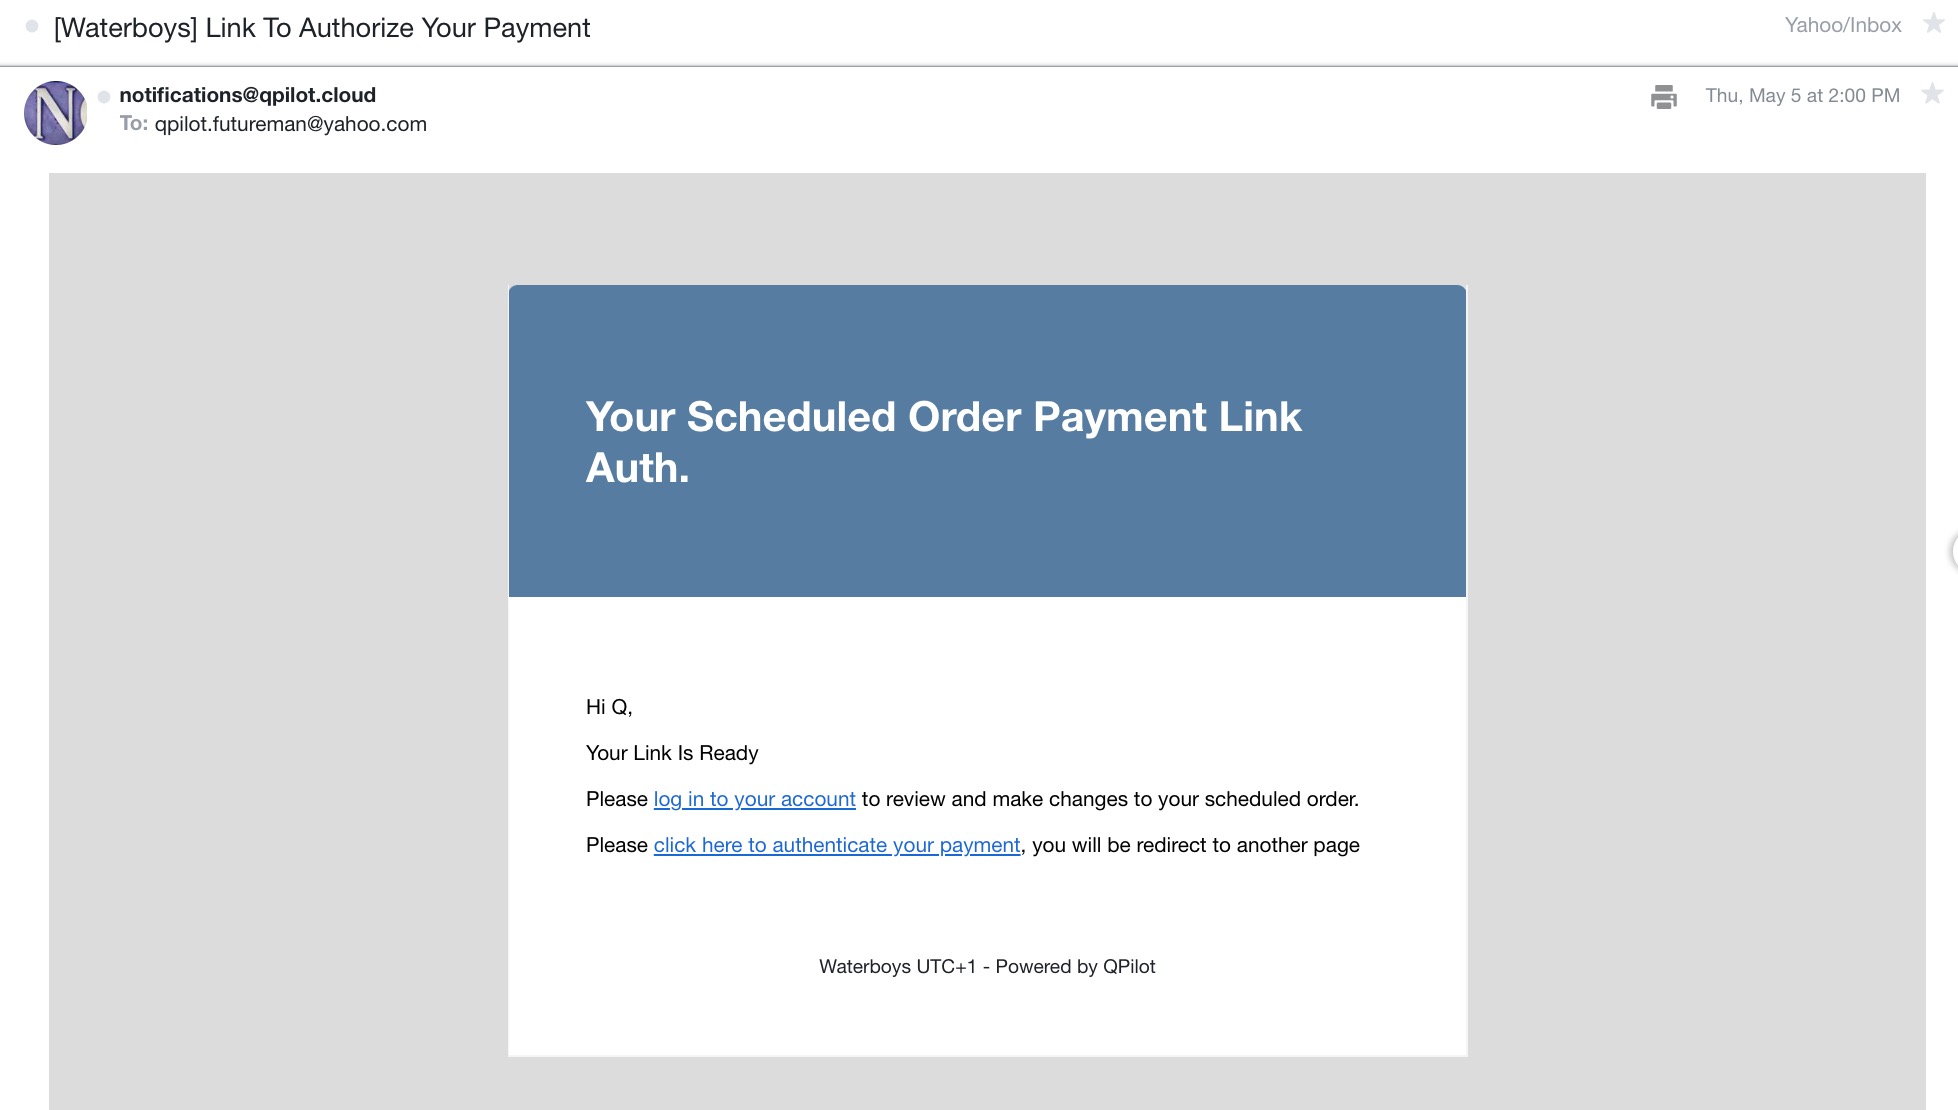
An email is sent to the Customer requesting them to authenticate their payment method.
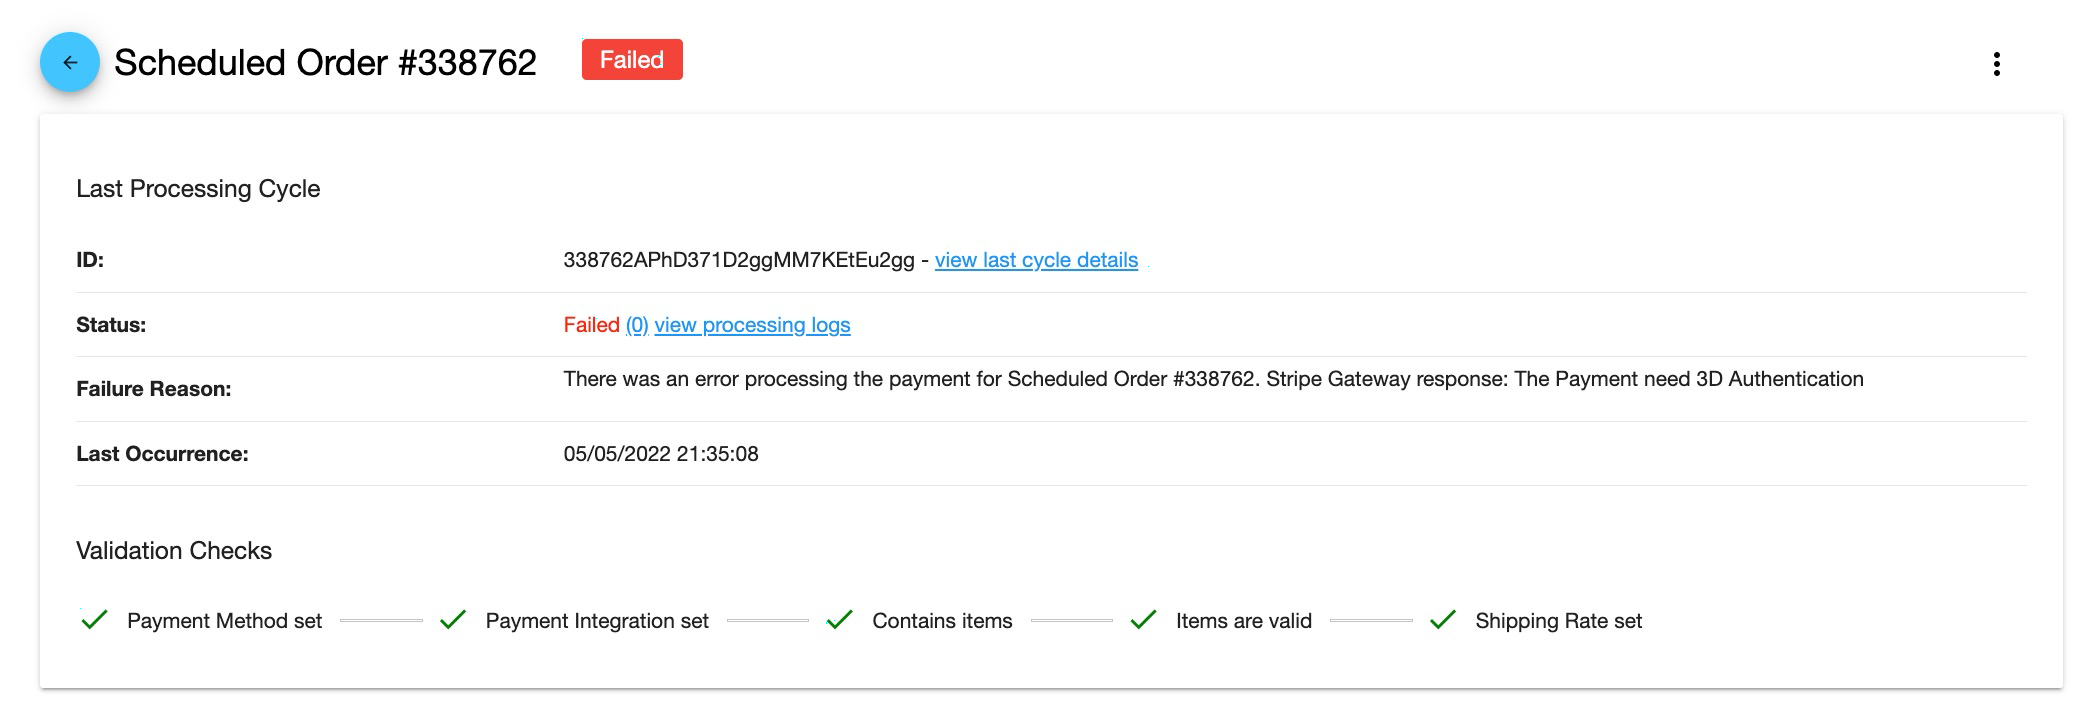
A merchant's view of a Scheduled Order that failed to process due to the payment method needing authentication.
Customize Statement Descriptors & Descriptions
A Statement Descriptor is how a transaction from your business shows up on your customers bank statement where a Statement Description adds additional details to the Payment Descriptor.
Stripe offers merchants the ability to fully customize their Statement Descriptors within Stripe - see Stripe's documentation for more details.
How to Customize the Statement Description QPilot Sends to Stripe
QPilot uses your site name set in QPilot > Sites > Edit Site > General Settings (more details) and the order id as a Statement Description used to identify payments processed by QPilot in your customers bank statements. For example, a business named "The Subscription Rx" for order id 1234 will display as "THESUBCRIPTIONRX-1234" as customers Statement Description.
To customize, simply edit the site's Name in the General settings identified above!
Stripe FAQ
Where do I find my Stripe API keys
Stripe's API keys can be found by logging into your Stripe dashboard, selecting the "Developers" menu option and selecting the "API Keys" menu option.
Displayed is the Publishable Key and the option to show the Secret Key.

How do I Create a New Stripe Customer Profile Manually?
In cases where a customer wants you to enter their payment information manually using Stripe, and have that payment method saved for QPilot, merchants can add a new customer profile to their Stripe directly and then create or edit a Scheduled Order with the payment data added to Stripe.

- Login to your Stripe dashboard and go to your Customers page
- Within the Customers page, select "Add Customer" (at the top)
- Fill out the customer's user and billing information:
- Email: Customer's email
- Billing Address
- Enter the new customer's profile then under the Payment Methods heading select "Add" > "Add Card" to add a new payment method. Include
- Card Number
- Exp Date
- CVV
- Select 'Add Card' to create the Payment Method for the customer. You will see a new payment profile added to Payment Methods section. Toggling it open will reveal the Payment Method Id
- Now that the Customer can be added to QPilot using their Customer and Payment Method Ids
Adding Payment Methods from Your Gateway to Scheduled Orders
QPilot is integrated directly with your Stripe gateway, this means you can add payments directly to QPilot so long as they exist in the gateway.
When Would I Add Payment Methods to QPilot from My Gateway?
- Migrating from another platform
- Customer / payment method exists in the Stripe, but not on site
You will first go to the QPilot Merchant Center > Dashboard > Scheduled Orders > "View/Edit" under the Payment Details section.
Manually Adding Payment Method to QPilot
Merchants can manually add a payment method to QPilot by editing a Scheduled Order and selecting "Create New" under the Payment Method field.
- Go to "Payment Method" field and select "Create New"
- Copy the Customer Id from your Stripe to the Gateway Customer Id
- Copy the Payment Method Id from your Stripe dashboard to the Gateway Payment Id
- Add the Payment Method Description (For Example: "Visa ending in 1111 Expires 01/25")
- Scheduled Order Billing Address => copied from the Stripe Customer Profile
- Update the Scheduled Order
Pro-Tip: If you need to process the Scheduled Order right away, select the action for Restart Processing or Process Now. Otherwise, update the Next Occurrence Date and set the Scheduled Order to an "Active" status.
In the recording below, an Admin manually adds an Stripe payment method to a Scheduled Order by copying the Customer Profile Id, Payment Profile Id, & Payment Method Description from their Stripe dashboard.
Loading a Stripe Payment Method
- Select "Stripe- Load Manually"
- Enter in the Gateway CustomerId and select "Load Profile"
- Select the payment method to apply.
- Select "Update"
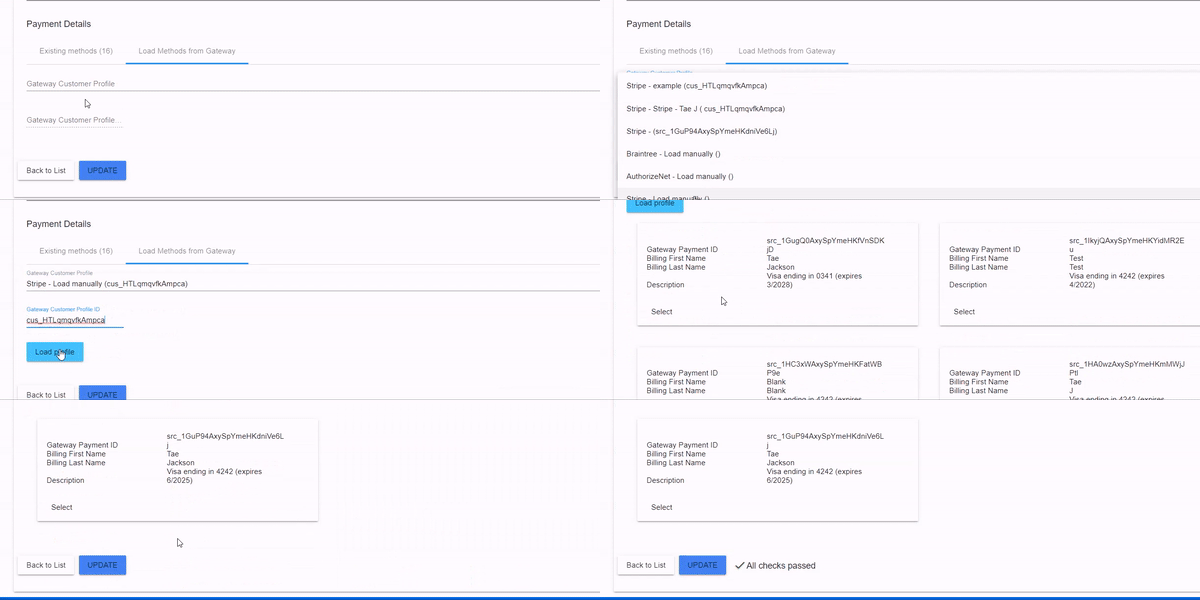
Loading Stripe Payment Method
Updated about 3 years ago
