Upzelo
Upzelo helps Ecommerce businesses increase revenue by retaining subscription customers for longer.
Your Ecommerce 'subscribe and save' growth is limited by the number of customers you can acquire, engage, retain, and re-engage. Upzelo helps you build a better product, better marketing, and retain more customers to keep your business growing. Build beautiful customer flow experiences that reflect your brand's design, quality, messaging and offers. Then, target subscribers with personalized offers and content to persuade them to stay.
For Example, with Upzelo you can:
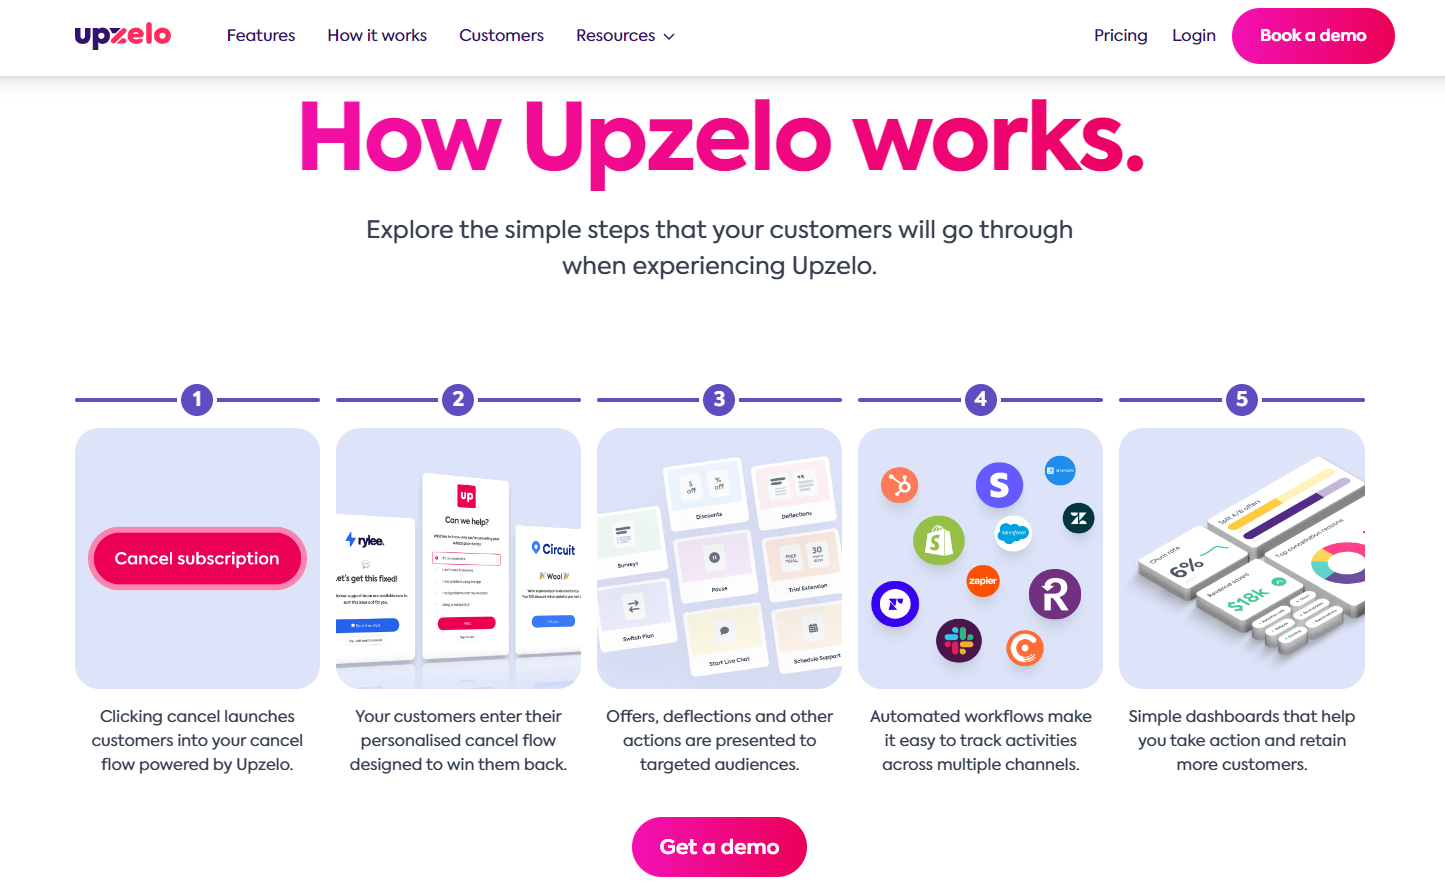
- Manage Surveys - Create surveys to learn why subscribers are canceling.
- Win back Customers with Offers - Pick from pre-made offers or build your own tactics.
- Track Performance - Understand why customers are leaving and take action
Learn more about the Upzelo and QPilot Integration here: Upzelo QPilot Integration .
Connecting QPilot to Upzelo
To connect Upzelo to QPilot, you should already have an Upzelo account and the ability to access your Upzelo account's settings.
Ready to sign up?
You can get an introductory 10% off and get started with Upzelo and QPilot by clicking on this link https://upzelo.com/signup?provider=qpilot!
By signgin up at this link, Upzelo will recognize that you want to connect QPilot as an integration.
-
Select the QPilot Site you'd like to connect to Upzelo.
-
Copy your QPilot API Key and add it to your Upzelo Account in Upzelo > Setup > Integrations.
-
Locate your Upzelo Account ID in Upzelo > Setup > Devolpers >> RetentionAPI (https://upzelo.com/app/developer/retention-api/) and copy and paste it your QPilot connection settings.
-
Then locate your Upzelo Retention API Key and copy and paste it into your QPilot connection settings.
-
Select Update to confirm your connection.

Developer Dashboard in Upzelo
Customers and Webhooks
When you first connect to Upzelo, please allow up to 2 hours for customer data to finish synchronizing. You'll be notifed by Upzelo when the customer sync is complete!
You will also need to wait up to 24 hours for Upzelo Webhooks to be enabled.
How to Setup an Upzelo Flow for Customers
Once you have connected your QPilot site(s) to Upzelo and your customer data has finished syncing, you are ready to create and enable flows for your customers. These flows will apply directly to your Scheduled Orders page in your site's Customer Account portal.
If you have any questions or need assistance, don't hesitate to reach out to the Upzelo Support Team!
Step 1: Create an Audience
An Audience creates a segment of your customers in which you can apply a flow (step 3) to. These segments can be broad or specific depending on your use case. When getting started, we recommend starting with broad segments (such as all active, paused, and failed Subscribers/etc).
- In your Upzelo account, go to Customers and then Audiences and select "Create Audience".
- Create an audience to get started! You can segment your audience by Scheduled Order status, frequency, and more.
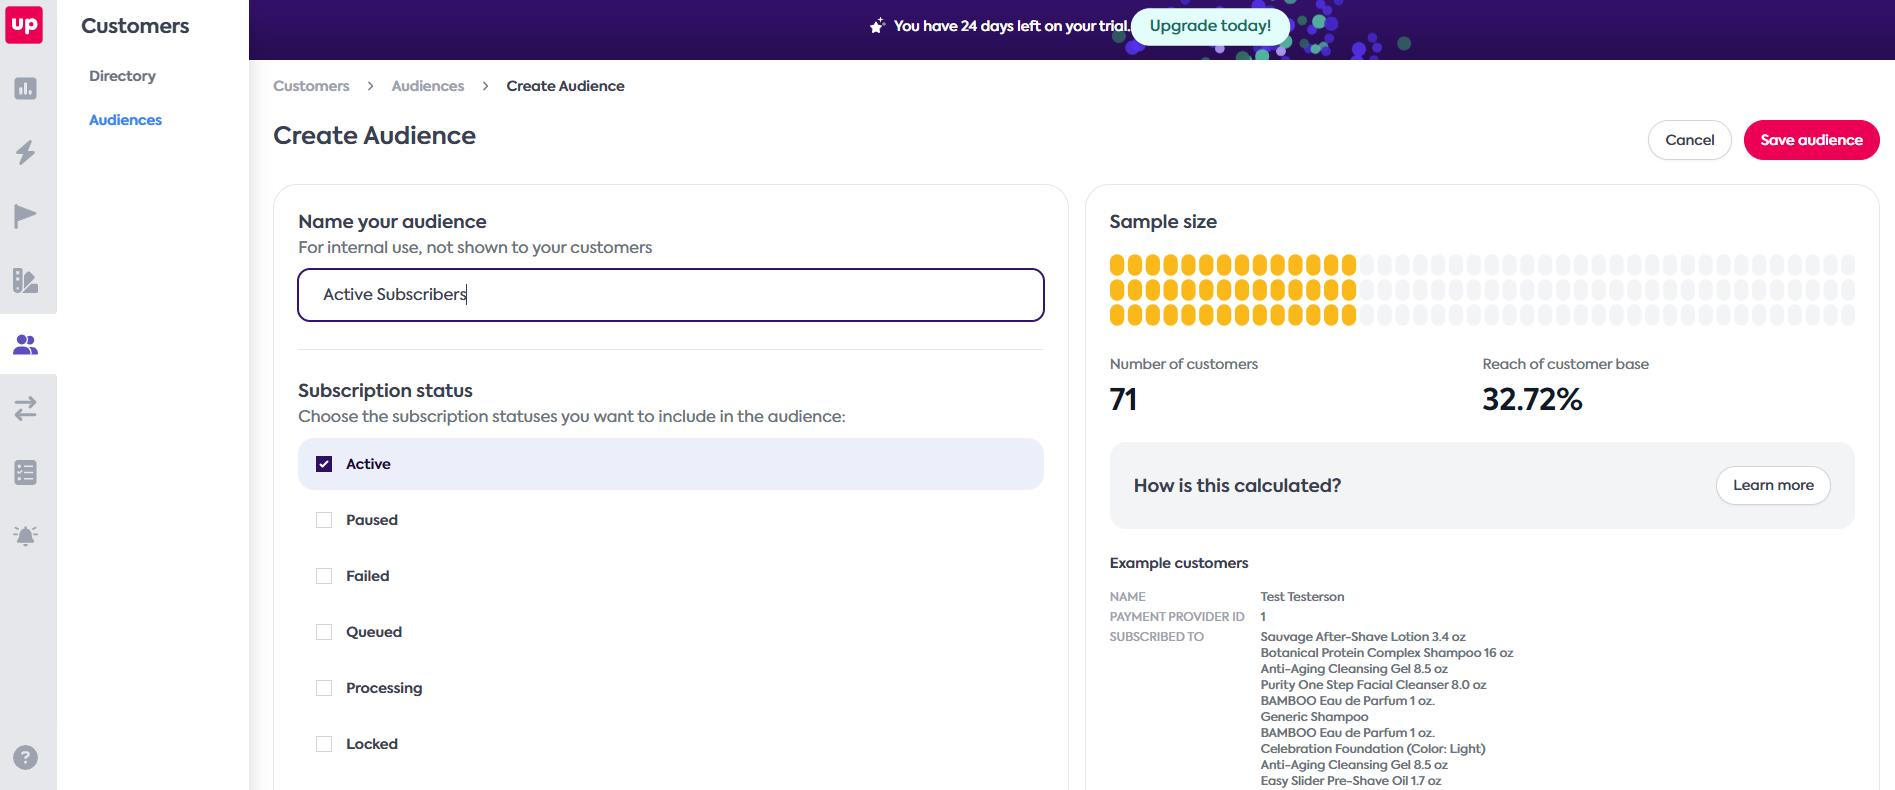
Example of creating an audience in Upzelo
Once you've created an audience, the segment will dynamically update with changes to your existing subscriptions! For example: if you have an active subscriber audience, the list will automatically update if a subscription is updated to an active status.
Step 2: Create an Action
There are many actions to choose from in Upzelo, the most common for QPilot are surveys and discounts! You can set up as many actions as you want, but we recommend starting with just a couple until you know what works best for your customers (or specific audiences and flows).
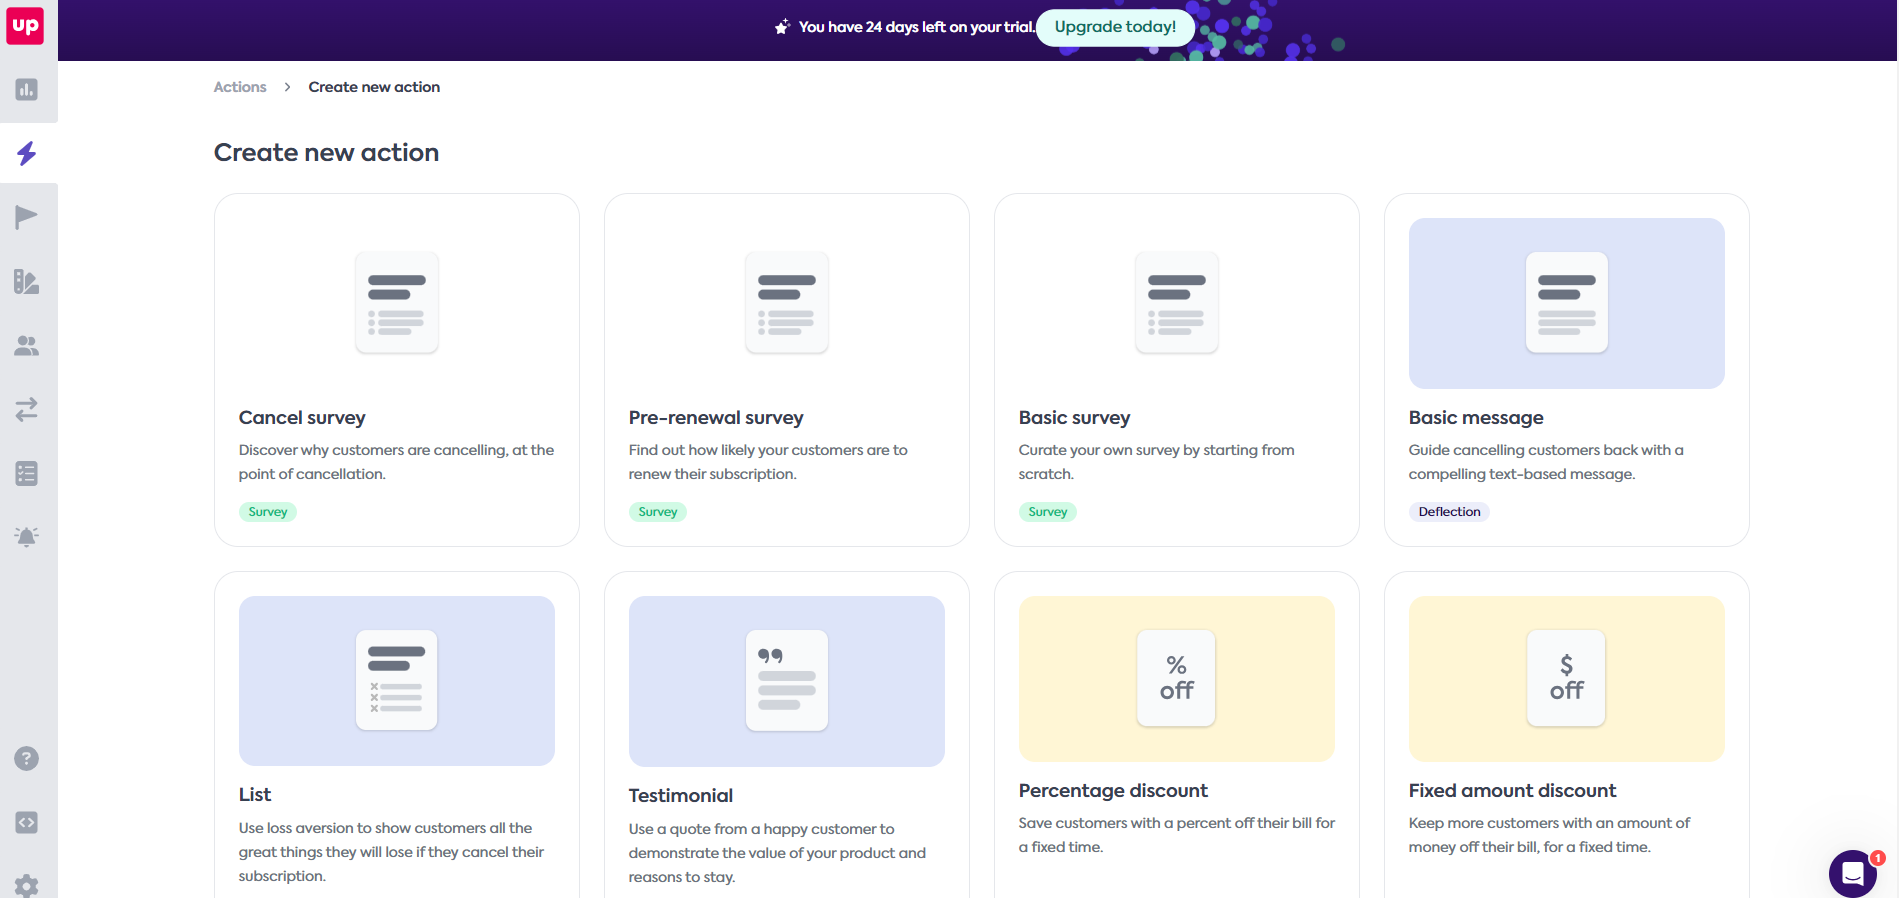
Actions in Upzelo
To create a new action:
-
In your Upzelo account, go to Actions and select "Create action".
-
Select the desired action and customize it to your needs. For example, you can edit survey questions or customize a discount!
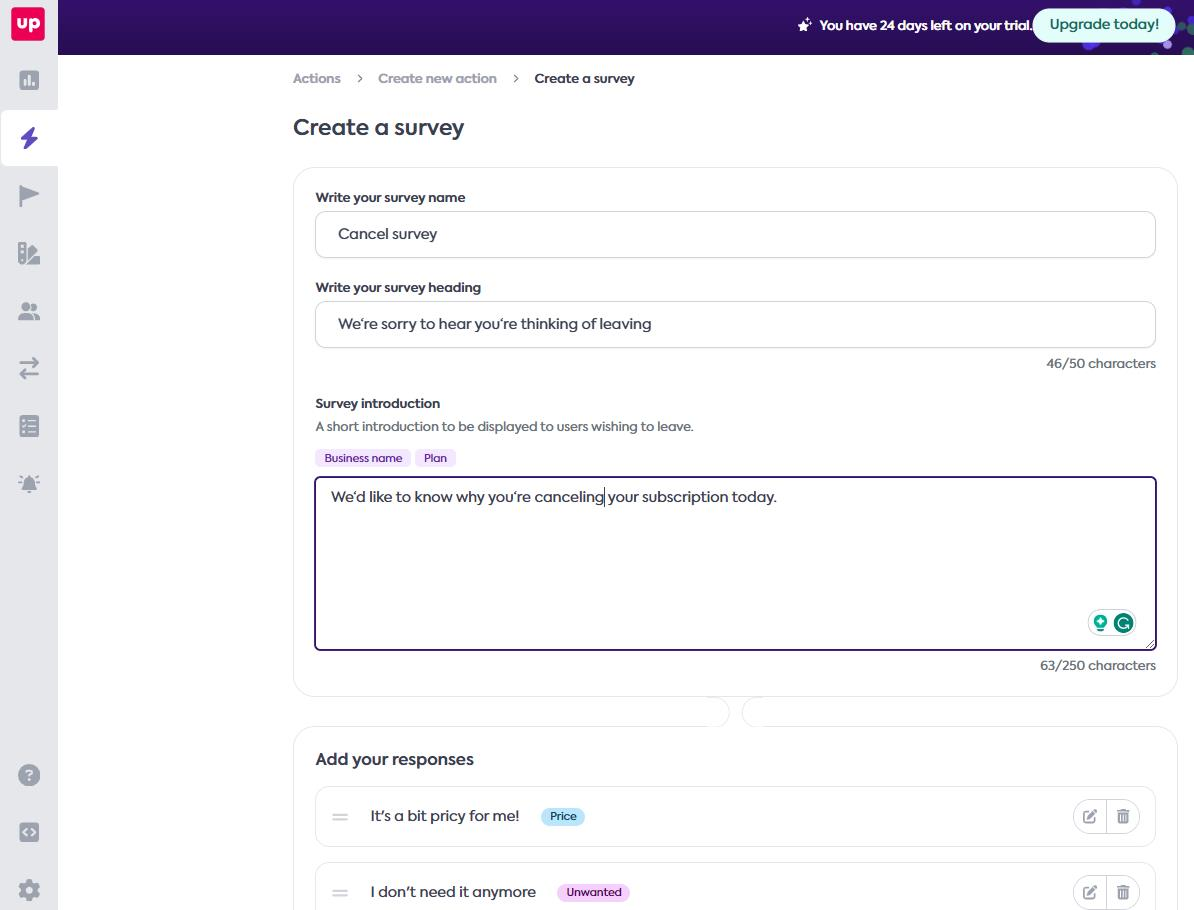
Example of creating a new survey action.
-
When ready, save your changes. You can now use this action in flows (see step 3 below).
Note: If you are offering a discount, it will automatically be applied through a QPilot coupon. These coupons are automatically created in QPilot by Upezlo!
Step 3: Create a Flow
The final step is to create a flow using the audience and actions you've created in steps 1 and 2.
- In your Upzelo account, go to Flows and select "Create a customer flow".
- Name your flow and select a design.
- Then select your audience, actions, and more (created in steps 1 and 2).
- When you've customized the flow as needed, save your changes and/or publish the flow.
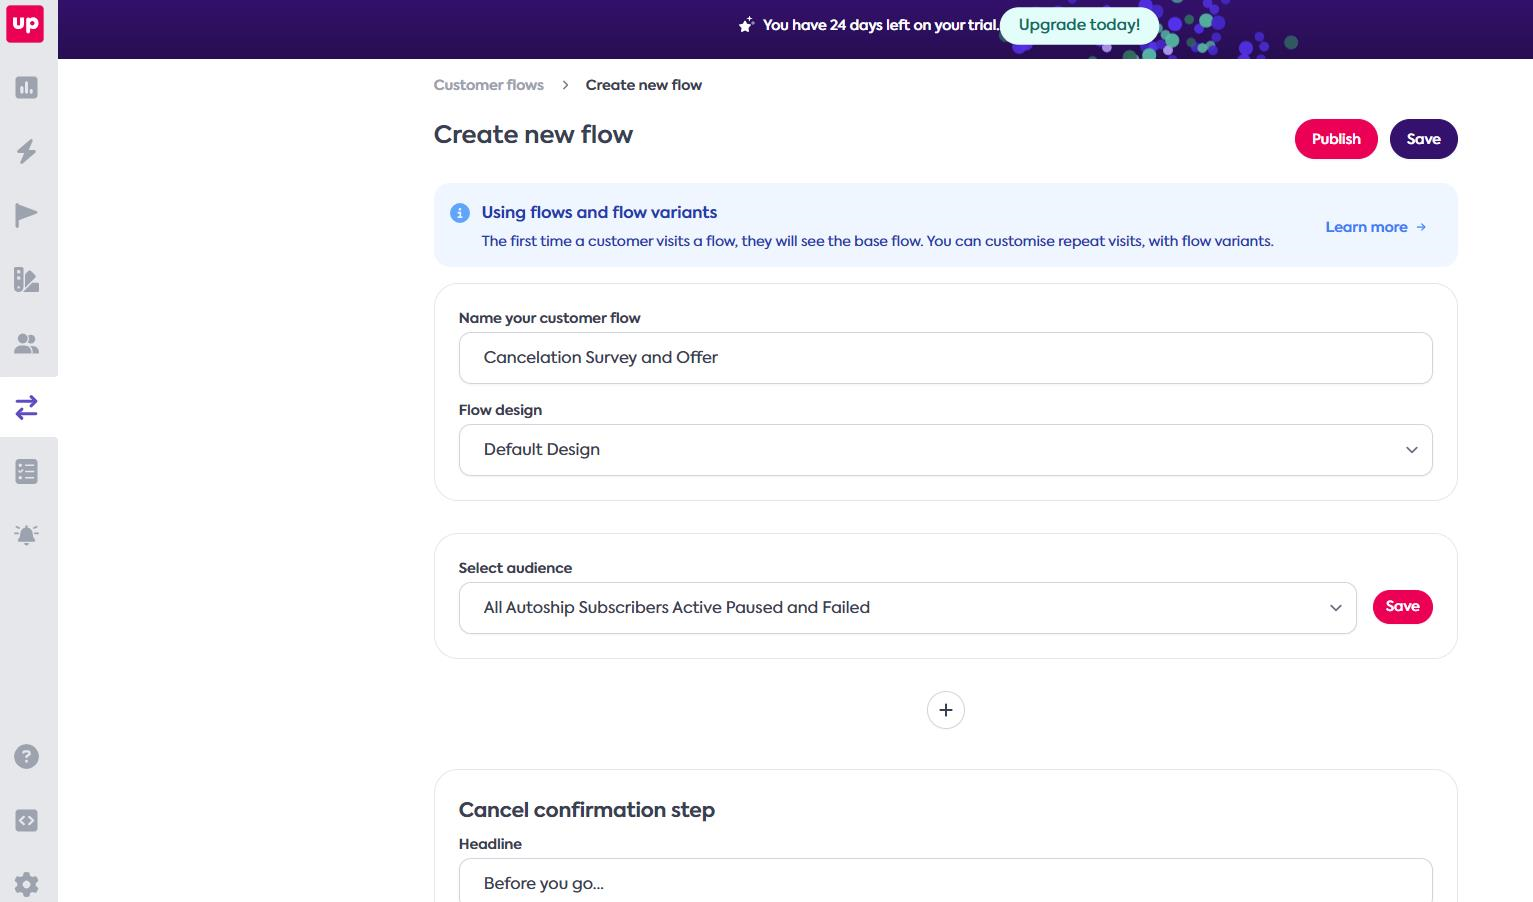
Example of creating a new flow in Upzelo
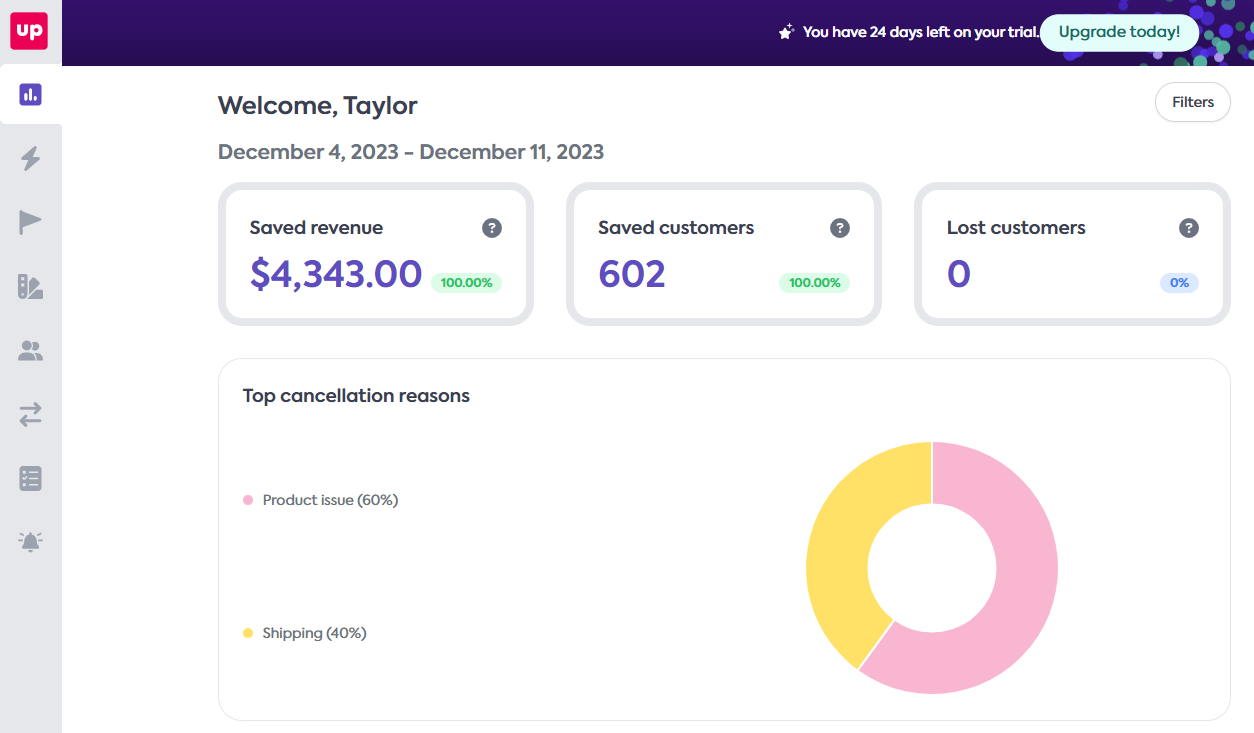
That's it! Now keep an eye on your Upzelo dashboard reports to track your retention and learn more about your customers.
Updated 10 months ago